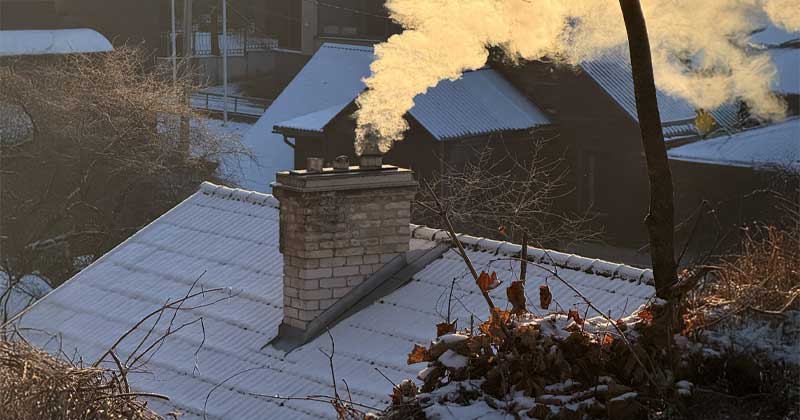
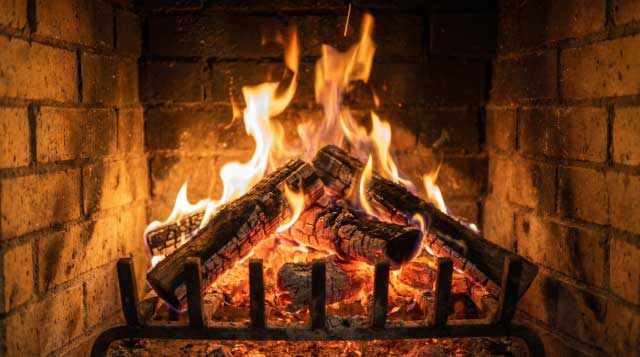
The fine grey powder collecting on your firebox floor between fires is not dust. It is refractory mortar, the material holding your firebox bricks together. And it is falling out of the joints above.
Most homeowners who notice it assume it is a cosmetic issue. It is not. Refractory mortar is the thermal barrier between the fire in your firebox and the structural masonry surrounding it. When it erodes, heat reaches masonry that was not designed to receive it. When it fails entirely, combustion gases find paths into the surrounding structure. In a pre-1980 home in Onondaga County, where the refractory mortar may be 50 or 60 years old and has absorbed thousands of thermal cycles. This is not a slow-developing problem. It accelerates.
This guide explains why refractory mortar fails in Central New York fireplaces, what correct repair requires, and why the most common DIY and contractor mistakes make the problem significantly worse. If you are seeing the signs described here, contact us for a free firebox assessment. We serve the full Syracuse metro area and Onondaga County with same-week scheduling.
What Refractory Mortar Actually Is and Why It Is Not Interchangeable With Standard Mortar
Standard masonry mortar, the material used in exterior chimney joints, brick walls, and concrete block construction, is formulated for structural load bearing and weather resistance. It is not formulated for direct flame exposure or repeated thermal cycling from ambient temperature to 1,000 degrees Fahrenheit and back.
Refractory mortar is a completely different material. It contains fireclay, alumina, and other heat-resistant compounds that allow it to expand and contract with the extreme temperature swings inside a firebox without cracking or losing cohesion. It is softer and more flexible than standard mortar by design. That flexibility is what allows it to absorb thermal stress rather than transferring it to the surrounding brick.
This distinction matters enormously in practice. Standard mortar used in a firebox application will crack within one or two heating seasons. It cannot absorb the thermal cycling and will fail, usually in pieces, leaving the refractory brick it was supposed to be holding unsupported. We regularly encounter fireboxes in Syracuse-area homes where a previous repair used standard mortar. It is always identifiable by its grey color, hard texture, and the fact that it has already begun to fail.
The correct material for firebox repair is refractory mortar formulated to meet ASTM C-199 standards, mixed and applied at the correct consistency, and cured properly before the fireplace is returned to use. There is no acceptable substitute.
Why Firebox Mortar Fails in Central New York
Refractory mortar has a finite service life under any conditions. In Central New York, several factors accelerate that timeline.
Thermal Cycling Volume
A fireplace used regularly throughout a six-month Syracuse heating season undergoes significantly more thermal cycles than one used occasionally in a milder climate. Each cycle from a cold firebox to operating temperature and back places stress on the refractory mortar joints. Over decades, the cumulative stress exceeds what the material can absorb. The joints that fail first are typically at the back wall of the firebox, where temperatures are highest and thermal stress is most concentrated.
Moisture Infiltration From Above
Water entering the chimney system through a cracked crown, failed flashing, or deteriorated flue cap reaches the firebox. Moisture sitting in refractory mortar joints accelerates deterioration by two mechanisms: direct chemical degradation of the mortar binder, and freeze-thaw expansion during the shoulder seasons when the chimney is cold. A firebox that shows rust on the damper or moisture staining on the back wall is receiving water from above, and that water is working on the mortar joints every day the fireplace is not in use.
Age of Original Materials
Most fireplaces in Onondaga County homes were built between 1920 and 1975. The refractory mortar installed at original construction has been absorbing thermal cycling and moisture stress for 50 to 100 years. Even a well-built firebox with correct original materials reaches end of service life within that timeframe. Annual inspection is the standard. In our experience, the majority of the firebox repointing work we perform in the Syracuse area involves mortar that is well past its expected service life and has been deteriorating undetected for years.
Prior Incorrect Repairs
This is the factor that most consistently converts a manageable repair into a significant one. A firebox that was repointed with standard mortar or with a DIY product not rated for firebox temperatures will have accelerated brick damage in the areas where incorrect mortar was used. The standard mortar does not flex with thermal cycling. Instead, it transfers that stress directly into the refractory brick, causing cracking that would not have occurred if the joint had been left open or filled with correct material. Identifying and removing prior incorrect repairs before repointing is a standard part of our firebox assessment process.
The Warning Signs: What Deteriorating Firebox Mortar Looks Like
Firebox mortar deterioration follows a predictable progression. Catching it at the early stages keeps the repair scope modest. Missing it until late stages typically means a partial or full firebox rebuild.
Stage 1: Powder and Dust in the Firebox
Fine grey or white powder accumulating on the firebox floor between uses. The mortar is eroding but the joints still have material in them. This is the best time to act. Firebox repointing at this stage typically costs $300 to $800 and restores full integrity.
Stage 2: Visible Joint Recession
Mortar joints that are visibly recessed. The brick face projects beyond the mortar surface. The joints may appear hollow at the edges. At this stage, the thermal barrier is compromised but the bricks are still in position. Repointing is still the correct repair, but the depth of removal and preparation work increases.
Stage 3: Open Joints and Loose Brick
Mortar is missing entirely from some joints. One or more refractory bricks shift when pressed. Heat is now reaching structural masonry behind the firebox lining during every fire. This stage requires refractory brick replacement in addition to repointing. The scope and cost increase significantly.
Stage 4: Structural Firebox Failure
Multiple loose or missing bricks, visible gaps in the firebox lining, or evidence that heat has reached the surrounding structural masonry. At this stage, a partial or full firebox rebuild is the correct scope. Repointing alone will not restore structural integrity.
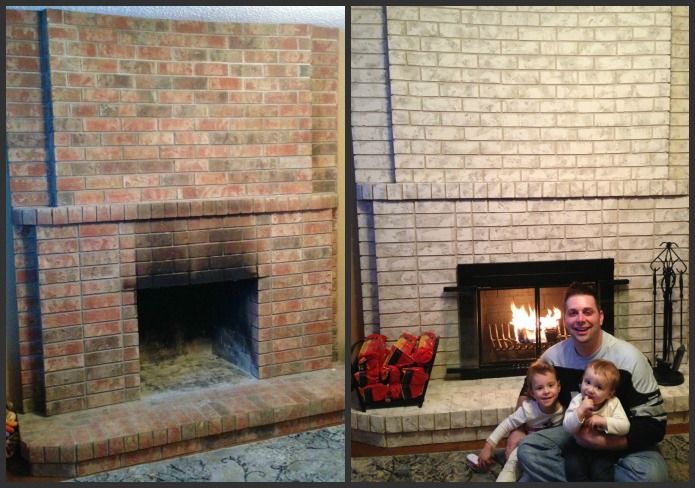
What Correct Firebox Mortar Repair Requires
Professional firebox repointing is not a surface application. It is a systematic removal and replacement process that, done correctly, restores the firebox to full thermal integrity.
Full Removal of Failed Material
All deteriorated mortar must be removed to a minimum depth of 3/4 inch before new material is applied. Applying new refractory mortar over old, failed material is the single most common reason firebox repairs fail prematurely. The bond between new and failed material is weak, and the new mortar inherits the instability of what is underneath it. This step is labor-intensive and is the primary reason professional firebox repair costs what it does. It cannot be shortcut.
Assessment of Refractory Brick Condition
Before repointing begins, every refractory brick in the firebox is assessed. Bricks with through-cracks, missing faces, or structural damage are replaced with matched refractory-rated material before new mortar is applied. Repointing around a compromised brick produces a repair that will fail at that brick within one or two seasons.
Correct Material and Consistency
Refractory mortar is mixed to a specific consistency which is firm enough to pack into joints without slumping and wet enough to bond to the surrounding brick. Too dry and the bond is weak. Too wet and the mortar shrinks excessively as it cures, pulling away from the brick edges. Mix consistency is one of the details that separates a repair that lasts from one that doesn’t.
Proper Cure Sequence
New refractory mortar must cure before the fireplace is used. Full air cure typically requires 24 to 48 hours minimum. After air cure, the first fires should be small and short. This is a process called heat cycling that gradually drives residual moisture from the mortar and allows it to reach full hardness. Lighting a full fire in a freshly repointed firebox before proper cure is complete will crack the new mortar at the joints. We provide specific cure and heat-cycling instructions with every firebox repair we complete.
Why the Wrong Repair Makes Things Worse
We want to address this directly because it is a consistent finding in our firebox assessments across Onondaga County.
A firebox repaired with standard mortar, whether by a DIY homeowner or a contractor who did not use refractory-rated material, will typically hold for one season, sometimes two. Then the standard mortar begins to crack and fragment under thermal stress. When it fragments, it does not simply fall away cleanly. It transfers the stress of cracking into the surrounding refractory brick, creating cracks in brick that was intact before the repair. The result is a firebox that now needs refractory brick replacement in addition to repointing which is a significantly larger and more expensive scope than the original repair would have required.
The same applies to surface-applied refractory caulk products marketed as DIY fireplace repair solutions. These products are appropriate for hairline surface cracks only. Applied over open joints or as a substitute for proper repointing, they create a surface seal over a deteriorated substrate that fails within a season and leaves the underlying joint in worse condition than before.
If your firebox has been previously repaired and is showing failure again quickly, the first question our assessment asks is what material was used in the prior repair.
Frequently Asked Questions About Firebox Mortar Repair in Syracuse, NY
Can I repair firebox mortar myself?
Minor hairline surface cracks in sound refractory mortar can be addressed with a correctly formulated refractory caulk by a careful homeowner. Any repair that requires removing deteriorated mortar and repointing joints, which is the majority of firebox mortar repairs we see in the Syracuse area, requires professional execution. The removal depth, material selection, mix consistency, and cure sequence all affect whether the repair lasts. Incorrect repairs accelerate damage to surrounding refractory brick and typically result in a larger, more expensive repair scope within one to two seasons.
How much does firebox mortar repair cost in Syracuse, NY?
Firebox repointing in the Syracuse area typically ranges from $300 to $800 for a standard firebox in good structural condition. When refractory brick replacement is required in addition to repointing, costs range from $500 to $2,500 depending on the number of bricks and extent of damage. Full firebox rebuilds, required when structural integrity has been compromised, range from $2,500 to $6,000 or more. A-Z Construction provides free written estimates with fixed pricing before any work begins.
What is the difference between refractory mortar and regular mortar?
Standard masonry mortar is formulated for structural load bearing and weather resistance not for direct flame exposure or extreme thermal cycling. Refractory mortar contains fireclay and alumina compounds that allow it to withstand firebox temperatures and flex with thermal expansion and contraction. Standard mortar used in a firebox will crack within one to two heating seasons and accelerate damage to surrounding refractory brick. Refractory mortar meeting ASTM C-199 standards is the only acceptable material for firebox repair.
How do I know if my firebox needs repointing or a full rebuild?
Repointing is appropriate when the refractory brick is structurally intact and the mortar joints are eroded or missing but the bricks themselves are in position. A rebuild is required when multiple refractory bricks are loose, cracked through, or missing; when there is evidence that heat has reached structural masonry behind the firebox lining; or when prior incorrect repairs have caused brick damage in addition to mortar failure. Our free firebox assessment identifies which scope applies and provides written pricing for both options when the situation is ambiguous.
How long does firebox mortar repair last?
A properly executed firebox repoint using correctly formulated refractory mortar, with full removal of all failed material and a proper cure sequence, should last 15 to 25 years under normal use conditions in a Central New York heating season. The variables that shorten that lifespan are continued moisture infiltration from above (crown, flashing, or cap failure), unusually high-intensity burns, and deferred maintenance that allows minor joint erosion to progress to brick movement before the next repair.
Why does my firebox keep needing repair every few years?
Recurring firebox repair – the same joints failing within a few seasons of the last repair – is almost always caused by one of three things: the previous repair used incorrect mortar material, the repair did not remove all failed material before applying new mortar, or there is an unresolved moisture source above the firebox that is continuously degrading the mortar. Our assessment identifies which condition applies. A correctly executed repair on a firebox without an active moisture problem should not require repeat attention within a decade.
Schedule a Free Firebox Assessment in Syracuse or Onondaga County
A-Z Construction & Restoration has been repairing and rebuilding fireboxes across Onondaga County for 40 years. Our free assessments identify exactly what your firebox needs, from repointing, brick replacement, to full rebuild, and provide written, fixed-price estimates before any commitment is made.
We serve Syracuse and surrounding communities including Fayetteville, Manlius, Liverpool, Clay, DeWitt, Jamesville, Camillus, Solvay, Skaneateles, Cazenovia, and throughout Onondaga County.
Schedule Your Free Firebox Assessment
Or call 315-488-5292 — Monday through Saturday, 7:00 AM to 7:00 PM.
- Learn more about our fireplace restoration services in Syracuse, NY
- Related: 7 Signs Your Fireplace Needs Restoration in Syracuse, NY
- Related: Chimney Repair & Rebuilds in Syracuse, NY
A-Z Construction & Restoration | Syracuse, NY | Serving Onondaga County Since 1984 | Licensed & Insured | EPA Lead-Safe Certified