A-Z Construction & Restoration

📍 Syracuse & Central NY

AUGUST SPECIAL: Free Foundation & Chimney Inspections

📞 Call Now: 315-488-5292

Vertical vs. Horizontal Foundation Cracks: Which Is More Serious?

Vertical vs. Horizontal Foundation Cracks: Which Is More Serious?

You’re doing a little spring cleaning in the basement when you spot it. A crack snaking down the concrete wall behind the shelving. Your stomach tightens. Is this the kind of thing you patch with a tube of filler on a Saturday, or the kind that means calling someone with a clipboard and a very expensive estimate?

Not all cracks are created equal. The direction a crack runs tells you a surprising amount about what’s happening beneath your home and how worried you should actually be. A thin vertical line and a horizontal split across the wall are two completely different conversations.

So let’s settle it. This guide breaks down horizontal vs vertical cracks in foundation, why each one forms, which one should genuinely worry you, and what it takes to fix them. By the end, you’ll know whether that crack in your basement is a shrug or a red alert.

First, Why Foundations Crack at All

Before we compare directions, it helps to understand the forces at play. Your foundation carries the entire weight of your home while fighting a constant battle against the ground around it.

Concrete is strong, but it isn’t invincible. It shrinks as it cures, shifts as the soil moves, and responds to whatever pressure the earth pushes against it. Over time, that stress has to go somewhere, and a crack is simply the path of least resistance.

A few common culprits drive most cracking:

  • Concrete shrinkage during the first year of curing
  • Soil pressure pressing inward against the basement wall
  • Hydrostatic pressure from waterlogged soil after heavy rain
  • Settling as the ground beneath the footing compresses unevenly
  • Freeze-thaw cycles that expand and contract the soil seasonally

Understanding these forces is the key to reading the different foundation crack types. The direction and width of a crack are like a fingerprint, pointing straight back to the cause.

Vertical Cracks: Usually the Less Alarming of the Two

Let’s start with the one that’s easier on the nerves. Vertical cracks run straight up and down, or sometimes lean at a slight diagonal, and they’re the most common type homeowners find.

Most of the time, these form from natural concrete shrinkage or minor settling in the months and years after a home is built. So are vertical foundation cracks normal? In most cases, yes. A hairline vertical crack, especially one that appeared within the first year or two, is often nothing more than the concrete finding its footing.

That said, “usually harmless” isn’t the same as “always ignore.” Width matters. A crack you can barely see behind a fingernail is very different from one you could slide a coin into. Keep an eye out for these warning signs:

  • The crack is wider than â…› of an inch
  • It’s getting visibly longer or wider over time
  • Water seeps through during or after rain
  • The gap is noticeably wider at the top or bottom

Even the friendlier Vertical cracks in walls deserve monitoring. Mark the ends with a pencil and a date, then check back in a few months. If it hasn’t moved and stays dry, you can usually relax. If it’s creeping, it’s time for a closer look.

So do vertical foundation cracks always need repair? Not always. Tiny, stable, dry ones can often be left alone or simply sealed to keep moisture out. The trouble begins when they widen, leak, or start pulling apart, which shifts them from cosmetic to something worth a professional opinion.

Horizontal Cracks: The Ones That Deserve Your Attention

Now for the crack that should make you sit up straight. When a line runs sideways across the wall, the story changes entirely.

Horizontal cracks typically mean the wall is under serious pressure from the outside. Waterlogged soil, frost, or the sheer weight of earth pushing inward can bow a foundation wall until it splits across the middle. That’s a structural warning, not a cosmetic one.

So are horizontal cracks in foundation bad? Generally, yes, and here’s why they’re worse than their vertical cousins. A vertical crack usually means the concrete moved a little. A horizontal one often means the wall is actively losing its fight against the ground. Left alone, the wall can bow further, shift inward, and eventually fail.

What causes horizontal cracks in walls comes down almost entirely to lateral pressure:

  • Hydrostatic pressure from saturated soil after prolonged rain or poor drainage
  • Expansive clay soil that swells when wet and pushes against the wall
  • Frost heave as freezing ground expands
  • Backfill or heavy loads placed too close to the foundation

If you spot a crack running across foundation wall at roughly the mid-height point, treat it as a priority. Look for companion signs too: a wall that bulges inward, doors and windows that suddenly stick, or gaps opening where the wall meets the floor. Any Horizontal cracks in walls paired with visible bowing mean the clock is ticking, and this is not a DIY weekend patch.

So, Which Is More Serious? The Direct Answer

Let’s cut to what you came here for. If you’re asking “Is a horizontal or vertical crack in foundation worse?”, the honest answer is horizontal, almost every time.

Here’s the logic in one breath: vertical cracks usually reflect settling and shrinkage that the structure can tolerate, while horizontal cracks reveal outside pressure actively working to collapse the wall. One is your foundation adjusting. The other is your foundation under attack.

A quick side-by-side makes the difference clear:

Feature

Vertical Crack

Horizontal Crack

Typical cause

Shrinkage, minor settling

Soil and hydrostatic pressure

Direction

Up and down or slight diagonal

Straight across the wall

Structural risk

Usually low

Often high

Common location

Anywhere on the wall

Mid-height, where pressure peaks

Urgency

Monitor, seal if needed

Call a professional promptly

Water concern

Possible seepage

Frequent, plus bowing

There’s an important middle category, though. Vertical or stair-step cracks wider than ÂĽ inch, especially the zigzag kind you see in block or brick walls, signal significant movement and belong in the “get it checked” pile alongside horizontal cracks. Width and pattern can push even a vertical crack into serious territory.

When a Crack Crosses the Line Into Structural

Not every crack threatens your home, so how do you know when is a foundation crack considered structural? It comes down to a handful of clear signals rather than the mere presence of a crack.

A crack tips into structural territory when it shows one or more of these traits:

  • It runs horizontally across the wall
  • It’s wider than ÂĽ inch or growing steadily
  • The wall bows, bulges, or leans inward
  • It forms a stair-step pattern through block or brick
  • Floors slope, or doors and windows jam without explanation
  • Water pushes through consistently after rain

Any one of these deserves a professional eye. Two or more together? Don’t wait. This is exactly what foundation cracks are worrisome in the eyes of a structural engineer: the ones tied to movement, moisture, and pressure rather than simple curing.

So if someone asks you how wide should a foundation crack be before you worry, a reasonable rule of thumb is this. Hairline to â…› inch and stable usually means monitor. Anything approaching or exceeding ÂĽ inch, or any crack that’s actively widening, warrants a call. And when it comes to which type of foundation crack is typically the most serious, horizontal cracks with bowing take the top spot every single time.

How These Cracks Actually Get Fixed

Good news: most cracks are repairable, and the method depends on the type and severity. Let’s walk through what the pros actually do.

For stable vertical cracks and minor leaks, the go-to solution is epoxy injection or polyurethane injection. The material is pumped directly into the crack, where it fills the gap, bonds the concrete back together, and seals out water. It’s quick, effective, and relatively affordable. In short, yes, horizontal foundation cracks can be repaired and vertical ones too, but the horizontal fixes usually go deeper.

Horizontal cracks and bowing walls call for structural reinforcement, not just sealing. How to fix horizontal cracks in foundation typically involves one or more of these approaches:

  • Carbon fiber straps bonded across the wall to stop further bowing
  • Steel I-beams or wall anchors that brace the wall and pull it back over time
  • Exterior excavation and waterproofing to relieve the pressure at its source
  • Improved drainage and a proper sump system to combat hydrostatic pressure

Because horizontal cracks stem from outside forces, lasting foundation crack repair here means addressing the water and soil pressure too, not just patching the visible line. Seal the crack without fixing the drainage, and you’ll be back where you started after the next big storm.

What Repairs Typically Cost

Money is usually the next question, so let’s talk numbers. Costs vary widely based on severity, access, and your region, but a rough sense helps you plan.

Simple vertical crack sealing via injection often lands in the few-hundred-dollar range. The cost to fix horizontal crack in foundation climbs higher because of the structural work involved, frequently running from a couple thousand into five figures when excavation, waterproofing, or wall stabilization enters the picture.

Here’s a general breakdown:

  • Minor crack sealing (injection): a few hundred dollars
  • Carbon fiber reinforcement: roughly $1,000 to $5,000 depending on the number of straps
  • Wall anchors or steel bracing: $3,000 to $12,000+
  • Full excavation and waterproofing: $10,000 and up for extensive work

Investing in professional foundation repair services early almost always costs less than waiting. A crack you address this year for a modest sum can become a bowed-wall emergency next year at ten times the price. The math strongly favors acting sooner.

When to Call a Professional (and When You Can Wait)

You don’t need to panic over every hairline. But you do need to know where the line sits between “watch it” and “phone a pro.”

You can usually monitor on your own when:

  • The crack is thin, vertical, and hasn’t moved in months
  • It stays dry through rainy stretches
  • There are no companion signs like sticking doors or sloping floors

Call for professional help when:

  • The crack runs horizontally or in a widening stair-step
  • You see any bowing, leaning, or inward movement
  • Water regularly finds its way through
  • The gap is wider than ÂĽ inch or clearly growing

A qualified structural engineer or foundation specialist can assess the cause, not just the symptom, and recommend the right fix. Reputable foundation repair teams will inspect the wall, measure any movement, check your drainage, and give you an honest read on urgency. There’s real peace of mind in knowing whether you’re dealing with normal aging or a genuine threat to your home.

Read the Crack, Then Act

Here’s what it all comes down to. Direction is your first clue. Vertical cracks are usually the calmer of the two, born from settling and shrinkage, while horizontal cracks signal outside pressure that can threaten the whole wall. Width, movement, and water tell you the rest of the story.

Measure the crack, mark its ends with a date, and watch it. If it’s thin, vertical, dry, and stable, you can likely breathe easy and seal it for good measure. If it’s horizontal, widening, leaking, or paired with a bowing wall, that’s your cue to bring in a professional before a small problem becomes a structural one.

And if what you find has you concerned, we’re here to help. At A-Z Construction, we provide expert Foundation Crack Repair and Basement Wall Stabilization to keep your home safe, dry, and standing strong for the long haul. Call us at 315-488-5292 or visit https://a-z-construction.com/foundation-crack-repair-syracuse-ny/ to schedule an inspection and get a clear, honest assessment of your foundation today.

Frequently Asked Questions

  1. Can foundation cracks get worse over time?

Yes. Small cracks can widen if the underlying cause—such as soil movement, water pressure, or settlement—isn’t addressed. Monitoring and early repairs help prevent more serious structural damage.

  1. Should I buy a house with foundation cracks?

Not necessarily. Many foundation cracks are minor, but horizontal, widening, or stair-step cracks should always be inspected by a qualified professional before you purchase the home.

  1. Can heavy rain cause foundation cracks?

Yes. Heavy rainfall can saturate the soil around your home, creating hydrostatic pressure that pushes against foundation walls and may lead to cracking or bowing.

  1. Are foundation cracks covered by homeowners insurance?

Usually not if they’re caused by normal settling, soil movement, or poor drainage. Coverage may apply if the cracks result from a covered event, such as certain types of accidental damage, depending on your policy.

  1. How can I tell if a foundation crack is active?

Mark the ends of the crack with a pencil and note the date. If it becomes longer, wider, or starts leaking over time, it’s considered active and should be professionally evaluated.
Why Ignoring Small Foundation Cracks Can Double Repair Costs

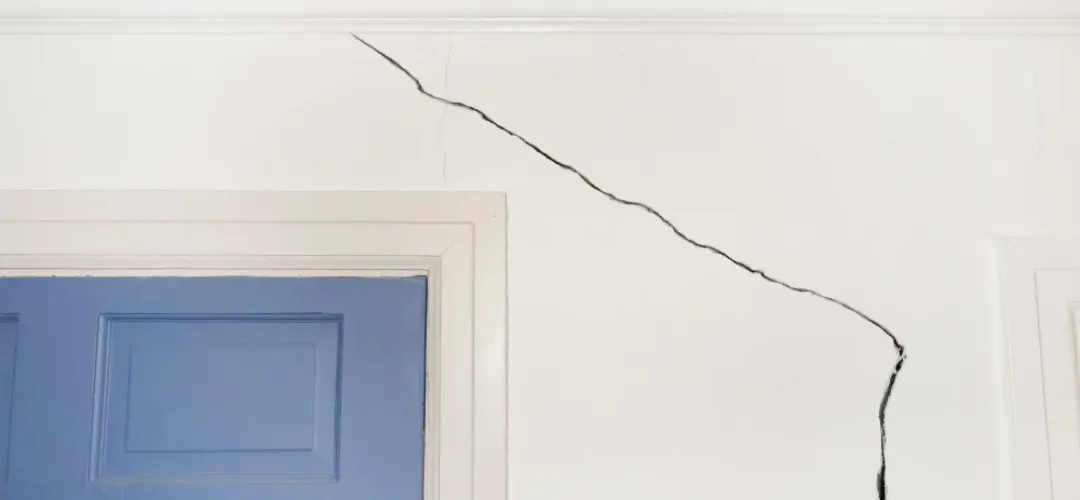
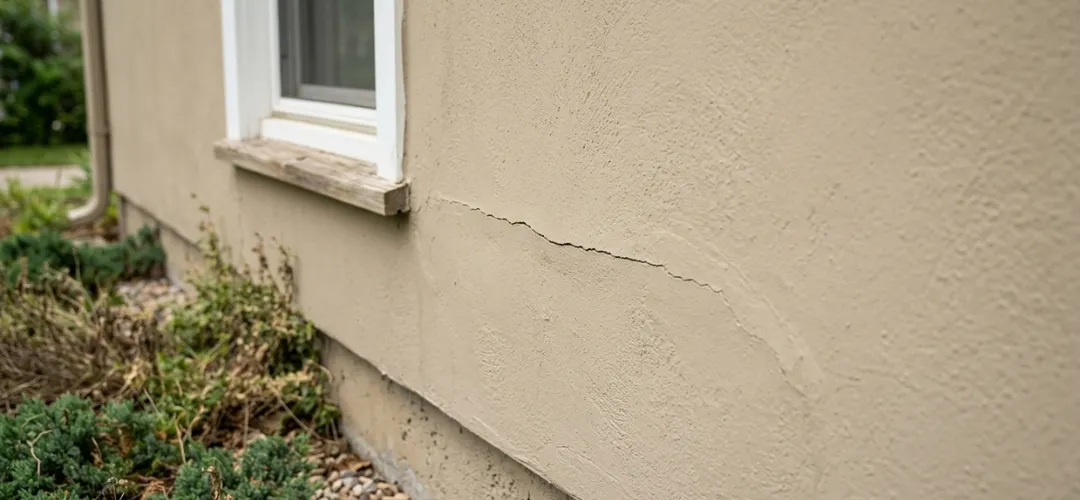
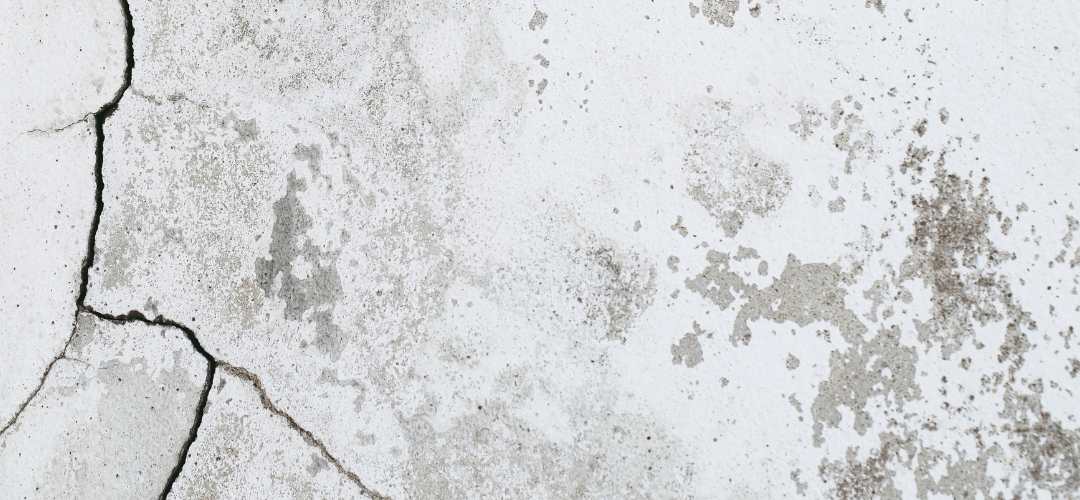
Why Ignoring Small Foundation Cracks Can Double Repair Costs

You have probably walked past that thin line in your basement wall a hundred times. Maybe you noticed it when you moved in, or maybe it showed up after last winter. Either way, you told yourself it was no big deal. Just a small crack. Every house has them.

Here is the thing about foundations. They do not send you a warning letter before they fail. That little crack is the letter and it is the first whisper of a problem that will only get louder. Water, soil pressure, and changing temperatures will take that hairline and turn it into a gap you cannot ignore.

So before you shrug and walk away, ask yourself this. How serious are small foundation cracks? The answer is that they are not serious yet. But give them time, and they will be. And by then, the fix will cost you ten times as much.

What Causes Small Foundation Cracks (And Why They Don’t Stay Small)

Small foundation cracks do not appear out of nowhere. They start when the ground beneath your home shifts, when rainwater soaks into the soil and freezes, or when your house settles unevenly over time. A little movement here and there is normal, but those small cracks are the first sign that something is happening.

But can small cracks in foundation get worse over time? Absolutely. Think of it like a crack in your windshield. One pothole does not break the glass, but that tiny chip spreads a little more every time you hit a bump. Your foundation works the same way. Every freeze-thaw cycle pulls the crack wider. Every heavy rain pushes water deeper into the gap. Every season of dry soil lets the ground shift a little more.

What causes small foundation cracks to get worse? Water is the biggest reason. When moisture seeps into a crack and freezes, it expands. That expansion puts pressure on the concrete, forcing the crack wider. Then more water gets in, and the cycle repeats. Add in soil pressure pushing against your foundation walls, and that hairline crack becomes a structural headache.

Small foundation cracks left alone do not heal. They grow. And what starts as a cosmetic nuisance becomes a real problem.

How Serious Are Small Foundation Cracks? (The Danger Spectrum)

Not all cracks are created equal. Some are cosmetic and others are warning signs of structural foundation issues. The difference comes down to three things. Where the crack is, which way it runs, and whether it is growing.

Vertical foundation cracks are the least threatening. These usually happen when concrete shrinks as it cures or when the house settles a tiny amount. A vertical crack under a quarter inch wide is rarely an emergency. Monitor it, seal it, and move on with your life.

Horizontal foundation cracks are a different story. These run side to side across your wall, and they mean soil or water is pushing from the outside in. Hydrostatic pressure is real, and it is strong enough to bow your walls over time. A horizontal crack is not a suggestion, it is a warning.

Crack Orientation and Urgency

Crack Type

Orientation

Typical Severity

Action Needed

Hairline

Random fine lines

Low

Monitor, seal if desired

Vertical

Up and down

Low to moderate

Seal, monitor for growth

Diagonal

Angled across wall

Moderate

Inspect, likely seal

Horizontal

Side to side

High to severe

Professional evaluation needed

Stair step

Zig zag in masonry

Moderate to severe

Inspect, may need structural repair

Structural foundation issues show up in other ways too. Sticking doors and windows, uneven floors, or cracks above door frames all point to movement. A vertical foundation crack that keeps growing month after month is not settling, it is shifting. And shifting means your foundation is still moving.

The danger spectrum is simple. If the crack is thin, vertical, and not changing, you probably have time. If it is horizontal, wider than a quarter inch, or growing, call someone. You don’t want to find out what happens if foundation cracks are left untreated.

What Happens If You Ignore Foundation Cracks

Ignoring a crack does not make it go away. It makes it worse.

Water Seeps In

That tiny crack is an open door for groundwater. Once moisture gets through, you are looking at wet basements, musty smells, and the perfect conditions for mold. A little dampness becomes a puddle and that puddle becomes a reason to replace drywall and flooring.

Soil Pressure Builds

The ground outside your foundation never stops pushing. Waterlogged soil expands and presses against your walls. A hairline crack turns into a bowing wall. A bowing wall turns into a structural failure waiting to happen.

Cracks Spread

What happens if you ignore foundation cracks is simple. They do not stay in one place. A vertical crack branches into diagonal cracks. New cracks appear near windows and doors. The damage spreads like a spiderweb across your basement walls.

Your Home Shifts

Your foundation holds up everything else. When it moves, so does the rest of the house. Floors become uneven. Doors stop latching. Drywall cracks appear upstairs where there were none before. A basement problem becomes a whole house problem.

The Repair Gets More Invasive

  • Early stage: epoxy injection ($300 – $1,500)
  • Moderate stage: carbon fiber straps or wall anchors ($2,000 – $6,000)
  • Advanced stage: piering or underpinning ($5,000 – $20,000+)

Why small foundation cracks should not be ignored is all about timing. Fix one crack today for a few hundred dollars. Wait until your walls bow and you are looking at a five figure repair bill.

Foundation damage repair is always cheaper when the damage is small. Always.

The Cost Escalation – From Small Fix to Major Repair

Here is where the numbers get real. Fixing a crack early costs a few hundred dollars. Ignoring it until your walls start moving costs thousands. The difference is not small, and it adds up fast.

Early Stage: Epoxy Injection

When you catch a crack while it is still thin and vertical, a professional can inject epoxy or polyurethane foam directly into the gap. This seals the crack, prevents water intrusion, and costs anywhere from $300 to $1,500. Not cheap, but manageable.

Moderate Stage: Carbon Fiber Straps or Wall Anchors

If you wait too long and the crack widens or your wall starts bowing, epoxy will not cut it anymore. You need carbon fiber straps to reinforce the wall or steel wall anchors to stabilize it from the outside. This jumps to $2,000 to $6,000.

Advanced Stage: Piering or Underpinning

Once the foundation has settled significantly or the wall is leaning dangerously, you are looking at piering or underpinning. Steel piers are driven deep into the ground to stabilize your foundation. This is major structural work, and it runs from $5,000 to $20,000 or more.

Foundation Repair Cost Comparison

Stage

Repair Method

Typical Cost

Early

Epoxy injection

$300 – $1,500

Moderate

Carbon fiber / wall anchors

$2,000 – $6,000

Advanced

Piering / underpinning

$5,000 – $20,000+

What is the average cost to repair a cracked foundation depends entirely on how long you waited. Fix it early and you might pay $800. Wait until your basement walls bow and you are writing a check for $15,000.

Cost to repair foundation is not just about the crack itself. Water damage, mold remediation, drywall repair, and landscaping restoration add thousands more. How much does foundation repair cost when you factor in everything? More than you want to spend, but less than ignoring it.

Foundation Crack Repair Solutions (What Actually Works)

Not every crack needs the same fix. Picking the wrong solution wastes money and leaves your foundation vulnerable. Here is what actually works at each stage.

DIY Crack Sealers (Cosmetic Only)

For hairline cracks that are not growing and not leaking, a tube of concrete crack filler from the hardware store might do the job. This is surface level only. It will not stop structural movement or seal against serious water pressure.

Epoxy Injection (Active Cracks)

Foundation crack repair for active but non-structural cracks starts with epoxy or polyurethane foam. Professionals inject it deep into the crack, where it bonds to the concrete and blocks water permanently. This works for vertical and diagonal cracks under a quarter inch wide.

Carbon Fiber Straps (Bowing Walls)

When a wall starts leaning inward from soil pressure, epoxy alone will not fix it. Carbon fiber straps are applied vertically across the crack and bonded to the wall with high strength epoxy. They stop further movement and add serious reinforcement.

Wall Anchors and Steel Beams (Severe Bowing)

For walls that have already moved significantly, you need mechanical stabilization. Steel wall anchors are installed outside in the soil and connected to steel beams inside. This allows you to actually straighten the wall over time.

Piering and Underpinning (Settlement Issues)

When your foundation is sinking or settling unevenly, the fix is not on the wall, it is under the ground. Steel piers or concrete pilings are driven deep into stable soil to lift and support the foundation. This is major work, but it is the only permanent solution for settlement.

Pro Tip: Foundation crack repair solutions are not one size fits all. A vertical crack needs different treatment than a horizontal one. A wall that has stopped moving is different from one that is actively bowing. Get a professional assessment before you spend money on the wrong fix.

Conclusion

A hairline crack today becomes a horizontal crack tomorrow. Ignore it and you go from a $500 epoxy fix to a $10,000 wall stabilization project. Water seeps in, soil pressure builds, and your foundation keeps moving. Catch it early, fix it right, and save yourself a massive repair bill.

If you have been staring at a crack and hoping it will go away, stop waiting. A-Z Construction specializes in foundation repair and basement wall stabilization, stopping small cracks before they become structural emergencies. We know clay soils and freeze-thaw cycles, and we have been fixing foundations since 1986. Call us at 315-488-5292 or visit https://a-z-construction.com/foundation-crack-repair-syracuse-ny/ to learn more.

Frequently Asked Questions

  1. What are the first signs that a small foundation crack is serious?


If the crack is widening, horizontal, or accompanied by sticking doors, uneven floors, or water seepage, it may indicate structural movement and should be inspected.


  1. Can small foundation cracks turn into major structural damage?


Yes. Small cracks can expand due to soil pressure, moisture, and temperature changes, eventually leading to bowing walls or foundation settlement.


  1. Should I repair small foundation cracks immediately?


Yes. Early repair is cheaper and prevents water intrusion and structural deterioration that can significantly increase repair costs later.


  1. What type of foundation crack is most dangerous?


Horizontal cracks are the most serious because they usually indicate pressure from soil or water pushing against the foundation wall.


  1. How do professionals fix foundation cracks?


Depending on severity, professionals use epoxy injection, carbon fiber reinforcement, wall anchors, or piering systems for structural stabilization.

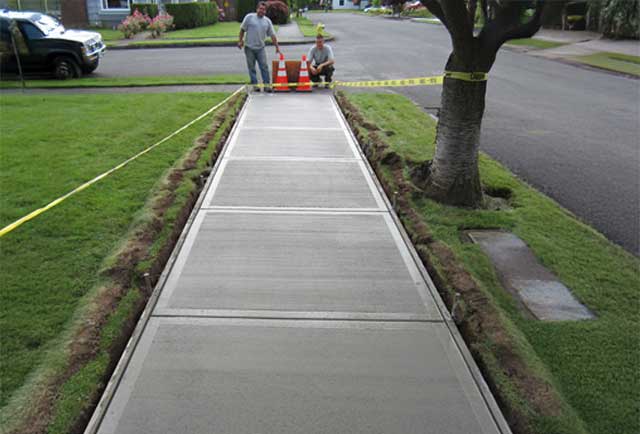
5 Reasons Your Concrete Sidewalk Is Cracking Faster Than It Should

5 Reasons Your Concrete Sidewalk Is Cracking Faster Than It Should

Concrete is supposed to last decades. So when you start noticing cracks in your concrete sidewalk after just a few years, or even a few months, it’s frustrating. And honestly, it’s more common than it should be.

Some cracking is normal. Concrete moves, settles, and responds to temperature changes over time. But premature cracking? That’s usually a sign something went wrong, either during installation, in the surrounding environment, or with ongoing maintenance.

This post breaks down the five most common causes of sidewalk cracking, what each one actually looks like in practice, and what you can do about it before small cracks turn into serious trip hazards or costly replacements.

1. Poor Installation From the Start

This one stings a little, especially if you paid for professional work.

Poor concrete installation is one of the most common causes of premature sidewalk failure, and it’s not always obvious until cracks start showing up months later. The most frequent culprits:

  • Too much water added to the mix: Contractors sometimes add water to make concrete easier to work with. That shortcut weakens the final product and makes it far more prone to cracking.

  • Inadequate base preparation: If the sub-base isn’t properly compacted before the pour, the concrete has nothing solid to rest on. It shifts, settles unevenly, and cracks.

  • Finishing too early: Working the surface while bleed water is still rising traps moisture inside and reduces surface strength.

  • Wrong concrete thickness: Sidewalks should typically be poured at a minimum of 4 inches. Anything thinner simply can’t handle regular load and foot traffic.

But what can you do about it? For minor surface cracks, concrete crack filler can buy you time. For structural failures rooted in a bad pour, full panel replacement is usually the only real fix.

2. Missing or Misplaced Expansion Joints

Here’s something most homeowners don’t know: concrete needs to crack in certain places. That’s what concrete expansion joints are for.

When concrete heats up, it expands. When it cools, it contracts. Without planned relief cuts, that movement has nowhere to go — so the slab cracks wherever it wants to, which is rarely convenient.

Expansion joint problems look like this:

  • Joints that are spaced too far apart (industry standard is roughly every 4 to 6 feet for sidewalks)
  • Joints that weren’t cut deep enough to actually guide the crack
  • No joints at all in longer sections of concrete

A well-cut control joint essentially creates a weak point on purpose. So when cracking occurs, it happens along that line and stays hidden rather than running across the middle of a slab.

This is a design and installation issue. If your sidewalk was laid without proper jointing, no amount of patching will fully solve the problem. Resurfacing with intentional saw cuts added afterward can help, but full sidewalk replacement is often the more practical long-term answer.

3. Tree Roots Pushing Up From Below

This is one of the most visually obvious, and most underestimated, causes of sidewalk damage. You’ve seen it: a slab that’s been lifted at an angle, with a visible ridge running underneath and a crack spreading outward from the edge.

Tree roots damaging sidewalks is a classic slow-motion problem. Roots follow moisture and grow toward it. If that means pushing through or under your concrete, they will.

A few things make this worse:

  • Trees planted too close to the sidewalk: Mature trees with aggressive root systems (maples, oaks, willows) cause the most damage
  • Shallow root systems: Some species spread roots near the surface rather than deep underground
  • Older sidewalks with gaps: Roots find the path of least resistance

The fix isn’t simple. Cutting the root can stress or kill the tree. Removing the tree solves the root problem but leaves a disrupted soil bed that still needs to be taken care of before you repour. Many municipalities handle sidewalk trip hazard repairs caused by tree roots so it is worth checking with your local public works department if the tree is in a right-of-way strip.

For homeowners, options include grinding down the raised edge (a short-term fix), installing flexible sidewalk panels designed to handle root growth, or full replacement paired with a root barrier.

4. Freeze-Thaw Cycles and Water Infiltration

If you live anywhere with cold winters, this one is working against your sidewalk every single year.

Freeze-thaw concrete damage happens when water seeps into small pores or hairline cracks in the slab, then freezes. Water expands by about 9% when it freezes. Do that repeatedly — every winter, sometimes multiple times a week during temperature swings — and the concrete literally breaks apart from the inside.

Signs of freeze-thaw damage:

  • Spalling: Chunks of the surface flaking or popping off
  • Surface scaling: A rough, pitted appearance where the top layer has deteriorated
  • Widening cracks: Small hairline cracks that grow noticeably wider season over season

Deicing salts make this even worse. They help melt ice, but they also accelerate moisture infiltration and chemical breakdown of the concrete surface. If you’re using rock salt on your sidewalk every winter, you’re speeding up the damage cycle.

What actually helps:

  • Seal your concrete every 2 to 3 years with a quality concrete sealer to reduce water absorption
  • Switch to sand or a calcium magnesium acetate-based deicer instead of sodium chloride
  • Address any cracked sidewalk repair in the fall before the first freeze since open cracks let water in faster

5. Soil Movement and Poor Drainage Underneath

The ground your sidewalk sits on is never completely still. Soil shifts, erodes, expands when wet, and shrinks when dry. When that movement isn’t accounted for, you get sidewalk settling — and eventually, cracks.

This is especially common in:

  • Clay-heavy soils that swell significantly when saturated and shrink when dry
  • Sandy or poorly compacted fills that erode or shift under load
  • Areas with inadequate drainage where water pools under the slab and softens the base

Think about a sidewalk panel that’s sunk on one end and raised on the other. That’s settlement in action. The slab is trying to follow the ground beneath it, but concrete doesn’t flex so it breaks instead.

Common drainage-related mistakes that lead to this:

  • Downspouts that direct water toward (not away from) the sidewalk
  • No gravel base layer under the concrete pour
  • Grading that causes water to collect along the sidewalk edge

Here’s the rule of thumb: If your sidewalk is cracking in a diagonal pattern across a single panel, it’s almost always a soil or drainage issue. Water found its way under, softened the base, and the panel cracked along the stress line.

The fix starts underground. Sidewalk repair without addressing drainage or base issues will just keep repeating itself.

Don’t Wait Until a Small Crack Becomes a Big Problem

Premature sidewalk cracking almost always comes back to one of five things. A poor initial pour, missing expansion joints, tree root pressure, freeze-thaw damage, or shifting soil underneath. Once you understand the cause, the right fix becomes obvious. The key is catching these issues early, before a hairline crack turns into a sunken slab or a genuine trip hazard that costs far more to address.

If your sidewalk is already showing signs of damage, A-Z Construction specializes in Concrete Sidewalk Repair. From freeze-thaw damage and salt deterioration to trip hazards and sunken slabs, we have been repairing and replacing sidewalks for years, so you’re in experienced hands. Call 315-488-5292 or visit https://a-z-construction.com/concrete-sidewalk-repair-syracuse/  to learn more.

Frequently Asked Questions

  1. Are small sidewalk cracks something to worry about?

Hairline cracks are often early signs of movement, but they should be sealed quickly to prevent water from entering and causing deeper structural damage.

  1. Can cracked concrete sidewalks be repaired without replacing them?

Yes, minor surface damage can often be fixed with patching or sealing, but deeper structural issues usually need partial or full replacement.

  1. What causes sidewalks to crack the most over time?

The most common factors are poor installation, soil movement, water damage, and temperature changes that slowly weaken the slab.

  1. How do tree roots affect concrete sidewalks?

Roots grow underneath slabs seeking moisture and can lift or shift concrete, leading to uneven surfaces and visible cracking over time.

  1. When should a damaged sidewalk be fixed?

Repairs should be done as soon as cracks or uneven sections appear, since delays often make the damage worse and more expensive to correct.

Chimney Rebuild vs Repair: 5 Key Differences Homeowners Miss

How to tell if your bowing basement wall needs stabilization — or replacement

You’re sitting by the fireplace, enjoying a cold evening, when you notice something odd about your chimney. Maybe it’s a faint crack in the brickwork, or perhaps there’s a draft where there shouldn’t be. And now you’re wondering: “Is it better to repair or rebuild a chimney?”

Here’s the thing. Your chimney isn’t just a decorative piece. It’s a hardworking part of your home’s heating and ventilation system, and when it starts showing signs of wear, the decision to repair or rebuild isn’t always straightforward. Do you patch up the cracks and call it a day, or is it time for a full rebuild?

In this blog, we’ll break down the difference between chimney repair and rebuilding, highlight the signs chimney needs repair or rebuild, and help you make the best choice for your home. So whether you’re worried about costs, safety, or long-term value, we’ve got you covered.

What is the Difference Between Chimney Repair and Rebuilding?

Before you start calling contractors in a panic, let us clear up exactly what these two terms mean. So, if you are sitting there wondering, what is the difference between chimney repair and rebuilding? The simplest answer comes down to the scope of the problem.

Think of chimney repair as a targeted fix. It focuses on addressing specific, isolated issues without tearing down the actual structure. If your chimney has a few cracked bricks, worn out mortar, or a damaged cap letting water sneak in, a repair is usually all you need. For example, a mason might come in to perform tuckpointing, which is just a fancy term for scraping out the old, crumbly mortar and replacing it with fresh material. It is a lot like getting a cavity filled at the dentist. It is quick, effective, and leaves the main structure entirely intact.

On the other hand, rebuilding is exactly what it sounds like. It involves tearing down part or all of the chimney and constructing it from scratch. You are not just patching a hole; you are replacing the structural integrity of the masonry itself. If your chimney looks like the leaning tower of Pisa, has massive vertical cracks, or the brickwork is actively crumbling into your yard, a repair will not cut it.

5 Key Differences Between Chimney Repair and Rebuild

Now that we have the definitions out of the way, let us dive into the details. When you are weighing chimney repair vs rebuild, it is easy to get caught up in the stress of the situation. But to make the smartest choice for your home, you need to look at the bigger picture. Here are the five biggest differences you should keep in mind.

1. Structural vs Cosmetic Issues

Repairs are all about fixing cosmetic or minor surface issues. Think of crumbling mortar, a few cracked bricks, or a rusted cap. These are problems that do not threaten the actual stability of your chimney. A rebuild, however, handles full structural failures. If your chimney is leaning, bowing, or dropping bricks onto your patio, a surface repair is like putting a tiny bandage on a broken leg. You need a rebuild to restore the structural integrity.

2. Cost Comparison

Let us talk about the budget. Homeowners always ask, is it cheaper to repair or rebuild a chimney? The short answer is yes, at least upfront. The average chimney repair cost is significantly lower because it requires less labor and fewer materials. However, if your chimney is in terrible shape, paying for repeated repairs will eventually drain your wallet. In those cases, the higher upfront chimney rebuilding cost is actually the more economical choice because it fixes the problem permanently.

3. Longevity and Durability

A solid repair can buy you a few extra years. It keeps the water out and makes everything look neat again. But it is still an old structure. Rebuilding gives you a completely fresh start. When you tear down the damaged masonry and build it back up with brand new materials, you are resetting the clock. A rebuilt chimney can easily last fifty years or more with proper maintenance.

4. Safety and Code Compliance

Building codes change over the years. A chimney constructed forty years ago might not meet today’s strict safety standards. Repairs only fix the immediate damage on an outdated structure. Rebuilding, on the other hand, makes sure your new chimney complies with modern fire safety codes, giving you and your family much better protection and peace of mind.

5. Underlying Causes

Sometimes a crack is just a crack. But other times, it is a sign of a much larger issue like a sinking foundation or severe internal water damage. Chimney repairs usually just address the surface symptom. A rebuild allows professionals to get right down to the root cause of the problem. They can fix the underlying footer or correct the drafting issues before building everything back up correctly.

Understanding these differences helps clear up the confusion. But you might still be wondering if pulling the trigger on a massive project is truly necessary.

Is Chimney Rebuild Worth It?

You are probably staring at the contractor quotes and asking yourself the big question. Is chimney rebuild worth it when a quick fix seems so much easier? It is a totally fair concern. But let us look beyond the price tag and think about the future of your home.

When deciding between a chimney repair or rebuild, you have to consider the long term value. Sometimes a basic chimney restoration just is not enough to reverse years of weather damage, water intrusion, or structural settling. If your masonry is leaning visibly or falling apart from the inside out, applying a fresh coat of mortar is like putting a tiny bandage on a broken arm.

Professionals who handle chimney repair and rebuilding will tell you that starting from scratch is often the smarter investment. Here is exactly why taking the plunge pays off.

  • Unmatched Safety: A crumbling structure is a huge hazard to your family and your property. Rebuilding eliminates the risk of a sudden brick collapse and ensures dangerous exhaust gases stay outside where they belong.

  • Better Heating Efficiency: A brand new setup means proper drafting. Your fireplace will burn fuel more efficiently and keep the warm air inside your living room instead of letting it escape through unseen cracks.

  • Modern Code Compliance: Old houses have plenty of charm, but their masonry often fails to meet today’s strict safety standards. A rebuild brings everything up to modern building codes, which is a massive selling point if you ever decide to list your house.

At the end of the day, spending money on constant patch jobs adds up fast. Tearing it down and starting over gives you true peace of mind and adds solid equity to your property. But before you make that final call, you probably want to know exactly what kind of numbers we are talking about.

How Do You Know If Your Chimney Needs Rebuilding?

Before we get into the exact numbers, you need to figure out what state your masonry is actually in. You might be standing in your yard right now thinking, how do you know if chimney needs rebuilding instead of just taking a quick patch job? It usually comes down to spotting the warning signs.

Grab a flashlight, step outside, and look for these clear indicators that your structure needs serious help:

  • Visible Leaning: If your masonry tilts to one side, the structural integrity is already gone. A basic surface fix cannot correct a failing foundation or severe shifting.
  • Spalling Bricks: When the faces of your bricks flake off and litter your roof or patio, moisture has destroyed the masonry from the inside out.
  • Severe Mortar Loss: Massive gaps between bricks where mortar used to sit mean the structure has completely lost its binding agent.
  • Heavy White Staining: Thick, fuzzy white salt deposits, known as efflorescence, signal heavy, ongoing water damage deep within the walls.

When you spot multiple items from this list, calling a qualified chimney repair & rebuild service is your smartest next move. Experts who specialize in chimney rebuilding and repair know exactly how to evaluate the internal damage that an untrained eye misses. They will map out your specific chimney rebuild and repair options, so your home stays safe, functional, and up to code.

Now that you know what warning signs to look out for, let us talk about what this kind of project might do to your wallet.

What is the Average Cost to Rebuild a Chimney?

You have inspected the bricks, spotted the warning signs, and finally accepted that a fresh start is the best path forward. Naturally, your next thought is focused entirely on the budget. If you are typing, what is the average cost to rebuild a chimney? into your search bar, you are probably bracing yourself for a massive number. The truth is, the final price tag depends heavily on a few specific details about your home.

Generally speaking, you can expect to spend anywhere from $1,500 for a partial job to over $10,000 for a complete teardown and reconstruction. Let us break down exactly where that money goes and what factors influence your final bill.

  • Extent of the Damage: A partial rebuild, which usually covers everything from the roofline up, is the most common and affordable option. If the foundation is solid but the top part is crumbling, you will stay on the lower end of the cost spectrum.

  • Material Choices: Not all building materials are created equal. Standard red brick is relatively inexpensive and easy to source. However, if you own a historic home and need custom masonry to perfectly match stones from eighty years ago, your materials budget will naturally increase.

  • Labor and Accessibility: Roof pitch and house height are equally important. If your masonry sits on a steep, three story roof that requires extensive scaffolding, labor costs will rise. Contractors must factor in the extra time it takes to safely access the workspace and haul heavy materials up and down.

  • Additional Components: Sometimes a rebuild uncovers hidden issues. You might need a new stainless steel liner, updated flashing to prevent future roof leaks, or a heavy duty cap. These necessary additions protect your new structure but will add to the overall estimate.

Ready to Make the Right Choice?

At the end of the day, deciding between a quick fix and a fresh start comes down to looking past the surface. While patching a few bricks might save you cash right now, it will not fix a failing structure or a leaning stack. Whether you repair minor wear or rebuild to ensure decades of safety, making an informed decision protects your home and your budget.

If you are still staring at those crumbling bricks and wondering what to do next, we can help you figure it out. At A-Z Construction and Restoration, we provide professional Chimney Repair & Rebuilding Services to help you choose the best fix for your situation and keep your chimney in peak shape year round. Give us a call at 315 488 5292 or visit https://a-z-construction.com/chimney-repair-syracuse-ny/ to learn more about our service.

Frequently Asked Questions

  1. Is it better to repair or rebuild a chimney?

It depends on the damage. Minor issues like cracked mortar or a few damaged bricks can be repaired, while structural problems like leaning or severe deterioration usually require a full rebuild.

  1. What is the average cost to rebuild a chimney?

A chimney rebuild typically ranges from $1,500 to $10,000+, depending on the extent of damage, materials used, and labor requirements.

  1. Is it cheaper to repair or rebuild a chimney?

Repairs are cheaper upfront, but repeated fixes can add up. In cases of major damage, rebuilding is often more cost-effective long term.

  1. How do you know if a chimney needs rebuilding?

Signs include a leaning structure, spalling bricks, large cracks, missing mortar, and significant water damage.

  1. How long does a chimney repair or rebuild last?

Repairs can last a few years depending on the issue, while a properly rebuilt chimney can last 30 to 50 years or more with maintenance.

How to Tell If Your Bowing Basement Wall Needs Stabilization or Replacement

How to tell if your bowing basement wall needs stabilization — or replacement

You’re standing in your basement and the wall looks wrong. It’s not straight anymore. There’s a crack running horizontally across it, or the center of the wall seems to be pushing toward you. You are trying to figure out how bad this actually is and whether you need a repair or a rebuild.

That decision matters more than most homeowners realize. Stabilizing a basement wall at the right time costs a fraction of what replacement costs. Waiting too long removes that option entirely. This guide gives you the framework to understand what you’re looking at, what it means structurally, and what A-Z Construction will recommend when we come out for a free basement wall stabilization inspection.


What “Bowing” Actually Means for Your Foundation

A basement wall bows when lateral pressure from the surrounding soil exceeds the wall’s structural resistance. The wall doesn’t crack first and then bow. It deflects incrementally over time, often over years, before a homeowner notices it.

The pressure source in most Syracuse-area homes is a combination of hydrostatic pressure (water-saturated clay soil pressing against the wall) and frost heave (that same water freezing and expanding inside the clay during our 60+ annual freeze-thaw cycles). Onondaga County’s heavy clay soil retains moisture far longer than sandy or loam soils, which is why bowing walls are common here and less common in areas with better-draining soil.

What you are measuring when you assess a bowing wall is the amount of inward deflection, how many inches the midpoint of the wall has moved from its original position. That number determines everything: which repair method is viable, how urgent the timeline is, and whether stabilization is still on the table.

The Key Number: 2 Inches

Two inches of inward deflection is the widely accepted threshold in structural masonry repair. Walls that have moved less than 2 inches can typically be stabilized without excavation. Walls beyond 2 inches require a more involved assessment. Walls beyond 4 inches are often candidates for replacement. Measure from the face of the wall at its straightest point to the farthest point of the bow.


The Four Stages of Wall Movement and What Each One Means

Stage 1: Hairline Cracking, No Deflection

Vertical or diagonal cracks appear but the wall is still plumb. This is the earliest warning sign. The concrete is yielding to pressure but hasn’t moved yet. At this stage, crack injection (epoxy or polyurethane, depending on whether the crack is structural or wet) is the correct repair. No further basement wall stabilization is generally needed. This is the cheapest point of intervention.

Stage 2: Early Bowing, Less Than 2 Inches

The wall has begun to deflect inward. You may see a horizontal crack at or near the midpoint of the wall. This is the classic sign of lateral soil pressure overcoming the wall’s resistance. The wall is still repairable without excavation.

Carbon fiber straps are the standard solution at this stage. High-tensile carbon fiber straps are bonded vertically to the wall surface, anchored to the floor and ceiling, and permanently prevent further inward movement. They do not restore the wall to its original position, but they stop the progression. Installation requires no excavation and is completed in one visit.

Wall anchors are an alternative, or a complement at this stage. Helical steel plates are driven through the wall and into stable soil outside the foundation, then connected to the wall with steel rods. Wall anchors have one significant advantage over carbon fiber: they can be tightened over time, gradually drawing the wall back toward its original position. If recovering some of the lost position is a priority, anchors are the right choice.

cracked leaning bowing basement wall deterioration

Stage 3: Moderate Bowing, 2 to 4 Inches

At this level of deflection, the wall is under significant structural stress. Carbon fiber straps alone are typically insufficient for basement wall stabilization. The load exceeds what bonded surface straps can reliably carry. Steel I-beam bracing is the primary method: vertical steel beams are installed floor-to-ceiling, transferring the lateral load from the wall to the structural framing of the house.

Wall anchors may still be used at this stage, often in combination with I-beam bracing. The repair is more involved and more costly than Stage 2 intervention, but it is still substantially less expensive than wall replacement. This is the stage where homeowners most often wish they had called sooner.

At 2 to 4 inches, the urgency increases meaningfully. Walls in this range should be assessed and stabilized before the next winter freeze-thaw cycle adds further pressure.

Stage 4: Severe Deflection, More Than 4 Inches or Active Failure

At deflections beyond 4 inches, and in cases where the wall is actively moving or has begun to lose structural integrity at the base or top, replacement may be the only structurally sound option. This means excavating the soil on the exterior, removing and rebuilding the wall, and reinstalling drainage to address the hydrostatic pressure source.

Wall replacement is significantly more expensive and disruptive than any stabilization method. It is also the correct answer when the wall’s structural condition no longer supports repair. A thorough inspection will determine which side of that line your wall sits on.

Why Waiting Is the Most Expensive Decision

A Stage 2 wall stabilized with carbon fiber straps costs a fraction of a Stage 3 steel I-beam repair. A Stage 3 wall addressed now costs a fraction of Stage 4 replacement. Wall movement does not stop on its own. Every freeze-thaw cycle adds pressure. Every spring thaw softens the clay. The decision window is real and it closes.


Comparing the Three Stabilization Methods

MethodBest forExcavation?Restores position?Relative cost
Carbon fiber straps< 2 inch bowNoHolds in place$
Wall anchors< 2–3 inches, recoverableMinimalYes — gradually$$
Steel I-beam bracing2–4 inch bowNoArrests movement$$$
Wall replacement> 4 inches or active failureYes – FullFull rebuild$$$$

Signs Your Wall Has Already Crossed a Threshold

Not every homeowner can measure deflection precisely. Here are the observable signs that correspond to each stage, so you know what urgency level applies before you call.

Call within the week:

  • Any horizontal crack in a concrete block or poured concrete wall, at any width
  • A wall that visibly curves inward when you stand at one end and look down its length
  • Doors or windows near the foundation that have recently become difficult to open or close
  • Cracks wider than ÂĽ inch that have grown since you last looked at them
  • White mineral deposits (efflorescence) along a horizontal crack line. This indicates sustained water infiltration at the stress point

Schedule soon: Not yet an emergency, but don’t delay:

  • Stable vertical or diagonal cracks less than ÂĽ inch that have not changed in several months
  • Minor efflorescence on the lower third of the wall with no visible movement
  • A wall that feels slightly “off” but doesn’t have a visible horizontal crack yet

Watch and monitor: Document with photos and dates:

  • Hairline vertical cracks that are dry and have been stable for a year or more
  • Light staining that appears seasonal and dries out between episodes

When in doubt, schedule a free inspection. Identifying the stage early costs nothing. A-Z Construction offers free carbon fiber strap installation assessments in Syracuse with same-week scheduling for structural concerns.


Why Syracuse Walls Bow More Than Walls in Other Regions

If you have friends in other parts of the country who own similar-age homes and have never dealt with a bowing wall, it’s not because they’re lucky. It is geology and climate.

Onondaga County sits on dense glacial till and clay-heavy soils that retain far more water than sandy or loam soils. After rain or snowmelt, that saturated clay exerts hydrostatic pressure against every basement wall it touches. When temperatures drop below freezing, water molecules in that clay ice up and expand by approximately 9% in volume. That expansion is frost heave, and it pushes laterally against your foundation walls with enormous force.

Syracuse averages more than 60 freeze-thaw cycles per year. That’s 60 cycles of expansion and contraction pressing against your walls, relaxing slightly, then pressing again. Each cycle is small. The cumulative effect over 10, 20, or 30 years is not.

Homes built in the 1950s through 1980s, the majority of the housing stock in Fayetteville, Manlius, DeWitt, Liverpool, Camillus, and the inner-ring Syracuse neighborhoods, are now old enough that this cumulative pressure has had decades to work. It’s why we see so many walls at Stage 2 and Stage 3 in those communities.

A Note on Older Block Foundations

Concrete block (CMU) foundations common in pre-1980 Central New York construction are particularly susceptible to horizontal cracking and bowing because the blocks are stacked and mortared. They lack the monolithic tensile strength of poured concrete. A horizontal crack in a block wall is structurally more serious than in a poured concrete wall of the same apparent severity. If your foundation is block construction, the urgency level for basement wall stabilization is higher at every stage.


What Happens at a Free A-Z Construction Inspection

When John Shinto’s team comes out for a free inspection, we do not arrive with a predetermined answer. We assess the wall material, measure the degree of deflection at multiple points, identify the crack pattern and what it indicates about pressure direction, look for water infiltration paths, and evaluate the soil and drainage conditions on the exterior if accessible.

You receive a written estimate that explains what we found, why we recommend what we recommend, and the full cost. If your wall only needs monitoring, we’ll tell you that too. We have been working in Onondaga County since 1986. Our reputation is built on accurate diagnosis, not on selling the most expensive solution to every problem.

We operate Monday through Saturday, 7 AM to 7 PM. For horizontal cracks or visible wall movement, we offer same-week scheduling. Spring thaw season (March through May) is our busiest period. If you have noticed new movement or cracks after snowmelt, do not wait until summer.

Schedule your free basement wall stabilization assessment in Syracuse →


Frequently Asked Questions

How do I measure how much my basement wall is bowing?

Hold a long straightedge (a level or a straight 2Ă—4) vertically against the wall. The gap between the straightedge and the farthest inward point of the wall is your deflection measurement. Measure at several points along the wall and record the largest reading. If you don’t have a straightedge long enough, a chalk line pulled taut from the top to the bottom of the wall works as well.

Can a bowing wall be fixed without excavating my yard?

In most cases, yes. Carbon fiber straps and steel I-beam bracing are both interior repairs that require no excavation. Wall anchors require driving helical plates through small holes in the wall into the soil outside. This is minimally invasive and does not require open excavation in most installations. Full excavation is only required for sub-grade waterproofing or wall replacement.

Is a bowing wall covered by homeowners insurance?

Typically no. Standard homeowners insurance policies exclude damage from hydrostatic pressure, soil movement, and settling which are the causes of almost all bowing basement walls. Some policies have endorsements for water backup or foundation coverage, but these are the exception. Check your policy’s exclusions section. What insurance generally does cover is sudden, accidental damage, not the gradual movement that causes bowing.

How long does basement wall stabilization take?

Carbon fiber strap installation for a typical residential wall (20–30 linear feet) is usually completed in a single day. Wall anchor installation is also typically a one-day job. Steel I-beam bracing installation takes one to two days depending on the number of beams required. None of these methods require curing time that prevents you from using the basement afterward.

What happens if I do nothing?

Wall movement does not stabilize on its own. The pressure driving it — soil, water, and frost heave — continues every season. A Stage 2 wall left unrepaired will become a Stage 3 wall. A Stage 3 wall will eventually reach the point where replacement is the only option. The cost difference between early stabilization and late-stage repair is significant. The cost difference between late-stage repair and full replacement is even larger.

Garage Floor Resurfacing in Central New York: When It Makes Sense, What It Costs, and Who It’s For

Garage Floor Resurfacing in Central New York: When It Makes Sense, What It Costs, and Who It's For

Spalling, pitting, surface cracks, and crumbling edges – Resurfacing can fix all of it without tearing out the slab. 

Why Resurfacing Is the Right Answer for Most Syracuse Garage Floors

If you’ve submitted an inquiry to us that sounds anything like “My garage floor is crumbling badly near where the overhead door comes down, there’s pitting throughout, and I have one crack,” you are in the right place.

That is one of the most common patterns we see on garage floors across the Syracuse area. And in most cases, it’s a resurfacing job, not a full slab replacement. This post explains the difference, helps you figure out which category your floor falls into, and covers what resurfacing costs in Central New York, including some small commercial applications that often fly under the radar.

What Is Concrete Resurfacing? (And What It Isn’t)

Resurfacing often gets confused with two other things, patching and epoxy coating. They are related but not the same.

Patching fills specific spots: a crack here, a spalled area there. It’s targeted, not comprehensive. Epoxy coating goes on top of the concrete as a protective and decorative layer. It is excellent for sealing a surface that is structurally intact and cosmetically acceptable. But it doesn’t fill in widespread pitting, level rough surfaces, or address surface scaling. It follows the contours of whatever is underneath it.

Resurfacing is a bonded concrete overlay, typically a polymer-modified mortar applied across the entire floor surface. It bonds chemically and mechanically to the existing slab, fills in the pitting and scaling, and gives the floor a new, uniform surface. In many cases, it’s the right middle path between spot patching (not enough coverage) and full slab replacement (more than necessary).

The key word is bonded. A resurfacing product that isn’t properly installed, on a poorly prepped or structurally compromised slab, will delaminate. That’s the failure mode to avoid, and it’s why surface preparation and slab evaluation matter as much as the product itself.

old concrete floor Crumbling Edge Pitting Resurfacing Syracuse Central NY

The Three-Problem Scenario: Crumbling Edge, Pitting, and a Crack

Let’s walk through the exact combination of symptoms that shows up most often in the inquiries we receive.

1. Crumbling or Spalling Near the Overhead Door
The zone directly inside the overhead door is the hardest-hit area of any garage floor in Onondaga County. Every winter, vehicles pull in tracking road salt, slush, and melting snow and that material concentrates at the door threshold. The freeze-thaw cycle does the rest: moisture infiltrates the concrete surface, freezes, expands, and breaks the surface aggregate apart from the inside out. Over multiple winters, the top layer of the concrete flakes and crumbles away. This is called spalling, and it is a surface condition, not a structural one as long as it has not progressed too deep into the slab.

Resurfacing addresses spalling directly. The overlay fills in the lost surface material and once cured, provides a harder, denser surface layer than the original concrete at that age.

2. Pitting Throughout the Floor
Widespread pitting, a rough, pocked surface across the whole slab, is scaling caused by salt damage. Sodium chloride doesn’t just sit on your floor; it draws moisture into the concrete’s pore structure and chemically attacks the cement paste that holds the aggregate together. The result is a surface that looks like it has been sandblasted from the inside: irregular, rough, and increasingly difficult to clean.

Pitting that covers most of the floor is exactly the scenario where resurfacing outperforms patching. You cannot practically patch dozens of square feet of pitted surface. The repair area is the whole floor. A bonded overlay addresses it uniformly.

3. One Crack
A single crack, depending on its width and depth, may or may not be a structural concern. Here is how we think about it:

  • Hairline or surface crack (under 1/8″): Likely a shrinkage or surface crack. Often injectable or fillable with a flexible polyurethane or epoxy product before resurfacing goes on top.
  • Mid-range crack (1/8″ to 1/4″): Needs evaluation for depth and movement. If the two sides of the crack are at the same level and the crack isn’t actively moving, it can typically be stabilized before resurfacing.
  • Wide or deep crack (over 1/4″, or with vertical displacement): A more serious structural signal. If the crack runs through the full depth of the slab or one side is higher than the other, resurfacing alone isn’t the answer. The underlying cause needs to be addressed first.

In the scenario described, crumbling edge, widespread pitting, and one crack, the crack usually gets repaired as a first step, then the resurfacing overlay goes on over the prepared slab. The result is a floor that looks and functions uniformly, without the patchwork appearance of spot repairs.

Is Your Slab a Resurfacing Candidate?

Resurfacing works when the underlying slab is structurally sound. The overlay depends on the slab for its support. It is not a structural layer itself. Here is a practical framework:

Resurfacing Is Usually the Right Call When:

  • Surface scaling, pitting, or spalling covers a large portion of the floor
  • Cracks are surface-level or under 1/4″ wide with no vertical displacement
  • The slab is solid underfoot with no hollow or soft spots
  • The sub-base hasn’t shifted or eroded (sections are level relative to each other)
  • The slab is fewer than 25 years old with isolated surface damage
  • You want a uniform appearance without the cost of full replacement

Full or Partial Replacement Makes More Sense When:

  • Cracks run through the full depth of the slab
  • Sections are heaved, sunken, or displaced relative to each other
  • There are hollow or soft spots when you walk the slab
  • The sub-base has failed (drainage issues, significant settling)
  • Damage covers the majority of the slab at structural depth
  • The cost to properly prepare the slab for resurfacing approaches the cost of replacement

When we come out for a free estimate, we will walk the slab, assess crack depth and width, check for hollow spots, and give you an honest answer about which category your floor falls into. If a full replacement is warranted, we will tell you and explain exactly why.

What Does Garage Floor Resurfacing Cost in the Syracuse Area?

Resurfacing is priced per square foot and depends primarily on the condition of the slab and the amount of prep work required before the overlay goes down.

ServiceTypical RangeNotes
On-Site AssessmentFreeNo obligation to proceed
Crack Repair$200 – $600Depends on length, depth, and crack type; often done before resurfacing
Concrete Resurfacing$3 – $7 / sq ftScaled or pitted slabs; slab must be structurally sound; includes surface prep
Epoxy Floor Coating$5 – $12 / sq ftIncludes surface prep, primer, and topcoat; can follow resurfacing
Concrete Polishing & Sealing$3 – $8 / sq ftDepends on current slab condition; low-maintenance finish
Partial Slab Replacement$800 – $3,000Damaged sections only; most common scope when resurfacing isn’t sufficient
Full Slab Replacement$2,500 – $8,000+Slab size, access, finish, and sub-base prep affect cost

FREE ESTIMATES  ·  SAME-WEEK SCHEDULING  ·  CALL (315) 488-5292

   Resurfacing Timelines and Cure Times

Most garage floor resurfacing jobs are completed within one to two days, depending on slab size and preparation requirements. Here’s what to expect after the work is done:

  • Foot traffic: 24–48 hours after the overlay is applied
  • Light vehicle use: 7 days minimum
  • Full cure for regular use: 28 days for heavy or repeated vehicle traffic

We’ll give you specific timelines at the estimate stage based on the product used and the time of year. Summer installations cure faster than fall or spring jobs, and we account for temperature and humidity in our scheduling.


Why Central New York Floors Deteriorate Faster Than You’d Expect

Syracuse has one of the highest freeze-thaw cycle rates in the United States, one of the highest rates of any metro area in the country. Each cycle is a stress event for concrete: water infiltrates, freezes, expands by about 9%, and forces the pore structure of the concrete slightly wider. Repeat that more than 100 times a year for 10 or 15 winters, and you have a floor that looks 30 years older than it is.

Add road salt to the equation, sodium chloride that draws moisture into those pores and chemically attacks the cement paste, and add Onondaga County’s clay-heavy soils that expand and contract seasonally, placing upward pressure on the slab from below, and you have three compounding forces that no concrete pour can fully resist indefinitely.

Resurfacing is one of the most cost-effective responses to this cycle, provided you address it before surface damage becomes structural damage.


Small Commercial Applications: It’s Not Just for Homeowners

Most of our resurfacing work is residential, but the same slab conditions show up in small commercial settings throughout Onondaga County and the same solutions apply.

Small Auto Repair and Detail Shops

A two-bay or three-bay auto shop has the same freeze-thaw exposure as any residential garage, plus the added wear of vehicle traffic, oil, and chemical spills. Resurfacing with an appropriate overlay system or following resurfacing with an industrial epoxy topcoat gives these floors a cleanable, durable surface without the downtime of a full pour.

Self-Storage Facilities

Drive aisles and covered unit floors at self-storage facilities see heavy vehicle traffic and significant salt exposure from customer vehicles. Spalling and surface scaling in these areas is common and creates a poor first impression. Resurfacing addresses the appearance and reduces the liability of uneven, crumbling surfaces.

Small Warehouses and Light Industrial in the Route 57 / Liverpool / Salina Corridor

Small warehouses, light assembly operations, and flex-industrial spaces in the Liverpool, Salina, and North Syracuse corridor frequently have older concrete floors that are sound structurally but badly surface-deteriorated. Rather than replacing the entire slab, which is a disruptive and expensive project, resurfacing restores the floor’s functionality at a fraction of the cost.

Municipal Maintenance and DPW Facilities (Smaller Towns)

Smaller municipalities such as Solvay, Camillus, Marcellus, or Baldwinsville often have maintenance garages and public works bays with concrete floors that have not been touched in decades. The same freeze-thaw and salt damage that affects residential floors is compounded by constant heavy equipment traffic. We assess these on a case-by-case basis and can work within municipal procurement requirements.

Rental Property Garages

Landlords and property managers with multi-unit properties that have attached or detached garages often face the same surface deterioration problem at scale. Resurfacing a rental garage floor before turnover is significantly less expensive than a replacement and makes the unit more marketable.

Car Dealership Service Lanes

Smaller independent dealerships and specialty shops have service lane floors that take a beating from vehicle traffic, lifts, and seasonal salt. Resurfacing the surface layer, rather than replacing the slab, minimizes the operational disruption.

A Note on Commercial Scope

A-Z Construction is primarily a residential contractor. We work well on small commercial projects where the scope is manageable, the relationship is direct, and the property is located within our Onondaga County service area. If you are managing a large commercial portfolio or need a contractor set up for public bidding on larger municipal projects, we will tell you honestly whether we are the right fit. For small commercial inquiries, call us at (315) 488-5292 and describe the scope. We will let you know quickly whether it is a project we can help with.


Before You Call: What to Observe About Your Floor

When you contact us, the more specific you can be about what you are seeing, the faster we can give you a preliminary sense of whether you are looking at resurfacing, patching, or replacement. Here is what to note:

  • Where is the damage concentrated? Near the door, throughout the floor, or in one section?
  • What does the surface look like? Flaking, pitting, scaling, crumbling, or smooth but cracked?
  • How wide are the cracks? Hairline (you can barely feel them), wider than a credit card thickness, or wide enough to see depth?
  • Are any sections uneven? Walk the floor and note if any area is raised or sunken relative to the rest.
  • Is there moisture? Does water pool on the floor after rain, or does the surface look damp even in dry weather?

You don’t need to diagnose the problem. That’s our job. But these observations help us arrive prepared and make the most of the on-site visit.


Get a Free Estimate

A-Z Construction & Restoration has been assessing and repairing concrete slabs, foundations, and masonry structures in Onondaga County since 1986. We’ll come to you, evaluate your floor honestly, and give you a written estimate before any work begins.


A-Z Construction & Restoration serves Syracuse, Fayetteville, Manlius, DeWitt, Jamesville, Liverpool, Clay, Camillus, Solvay, North Syracuse, East Syracuse, Cazenovia, Chittenango, and surrounding communities throughout Onondaga and Madison counties.

The Hidden Costs of a New Patio: Syracuse Homeowner’s Guide

THE HIDDEN COSTS OF A NEW PATIO IN SYRACUSE & ONONDAGA COUNTY

Invest in a Patio Foundation that Survives CNY Winters – Not just a Surface that Looks Good in July.

Why do Patio Quotes in Onondaga County Vary by Thousands of Dollars?

You’ve scrolled through Pinterest, saved a dozen “dream backyard” photos, and now you’re ready for a quote. But here is the reality: in Central New York, a patio isn’t just a surface you walk on. It is a structural element that has to survive a brutal cycle of lake-effect snow, deep freezes, and spring thaws.

If you are comparing quotes for a new patio in Onondaga County, you’ve likely noticed a massive price gap. Why does one contractor quote $12,000 while another quotes $19,000 for the exact same square footage?

The difference is rarely “markup.” It’s what is happening underneath the pavers.

Here is the breakdown of the high-value “hidden” costs that determine whether your patio lasts 20 years or buckles after two Syracuse winters.

patios hardscapes built to outlast Syracuse and Central NY winters.

1. The 12-Inch Rule: Excavation and Soil Management

In our region, the “frost heave” is the enemy. If a contractor only digs down 4-6 inches, your patio will shift the moment the ground freezes in January.

  • The Hidden Cost: Proper excavation for a CNY patio usually requires removing 10–12 inches of soil to make room for a compacted sub-base.
  • Why it matters: Syracuse has heavy clay soils that retain water. Without a deep, well-compacted base of crushed stone, your pavers will become an uneven tripping hazard within 24 months.

2. Advanced Drainage Systems (The “Swamp” Insurance)

Does your backyard stay soggy after a spring rain? Simply laying pavers over that spot won’t fix it; it will just create a heavy stone “raft” that sinks into the mud.

  • The Hidden Cost: Integrating French drains or grading the yard to move water away from your home’s foundation.
  • Pro Tip: When planning your outdoor living space, always ask if your quote includes a pitch of at least 1/8 inch per foot to ensure water runoff.

3. Geotextile Fabric: The Invisible Barrier

Many “budget” installs skip geotextile fabric to save a few hundred dollars. This is a critical mistake.

  • The Hidden Cost: A high-quality woven fabric placed between the raw soil and your gravel base.
  • Why it matters: It prevents the heavy stone base from sinking into the soft clay soil over time. It’s the difference between a patio that stays level and one that develops “potholes.”

4. Polymeric Sand: The “Glue” That Breathes

The sand between your pavers isn’t just play sand. We use specialized polymeric sand that hardens when misted with water.

  • The Hidden Cost: Premium jointing sand that resists washouts and prevents weed growth.
  • Expert Insight: Cheap sand washes away in a Syracuse thunderstorm, leaving gaps for ants to move in and weeds to take root. According to the Interlocking Concrete Pavement Institute (ICPI), proper jointing is essential for structural integrity.

5. Permit and Utility Logistics in Onondaga County

Before a single shovel hits the dirt, there are administrative costs that protect your property value.

  • The Hidden Cost: Local building permits and Dig Safely New York (811) coordination.
  • The Local Edge: Whether you’re in the City of Syracuse, Manlius, or Cicero, local zoning laws have specific “impervious surface” limits. A professional contractor handles these Syracuse hardscaping permits for you.

finished patio and steps design and construction camillus ny

The Final Piece: Seamless Transitions with Custom Steps

A great patio is only as good as the way you access it. If your backyard has a slope or your back door sits several feet above the grade, the transition becomes a focal point of the design. Cutting corners on the foundation of your steps is just as risky as neglecting the patio base; without deep footings, Syracuse winters will cause steps to pull away from your home’s foundation. Integrating custom steps into your hardscape ensures that your elevation changes are not only safe and code-compliant but also architecturally consistent with your new stone surface.

Final Thoughts: Is the Cheaper Quote Actually More Expensive?

A “cheap” patio that fails in three years costs double because you have to pay to tear it out and rebuild it correctly. At A-Z Construction, we focus on ROI, not just the day we finish, but the value of your home a decade from now.

Ready to build a patio that actually lasts? Get a Professional Hardscape Evaluation for your Syracuse home today.

Why Syracuse Concrete Fails: 5 Ways Our Winters Destroy Your Walkways

Why Syracuse Concrete Fails: 5 Ways CNY Winters Destroy Your Walkways

Winter Syracuse Concrete Damage ·  Syracuse & Onondaga County  ·  Updated March 2026

Syracuse Concrete Damage: Five Winter Forces Destroying Your Walkways

Syracuse averages more than 100 inches of snow a year, one of the highest totals of any city in the continental United States. But snowfall alone isn’t what destroys concrete. It’s what happens between the snow events: the temperature swings, the road salt, the ground beneath your slab, and the relentless trees pushing up from below.

Understanding Syracuse concrete damage caused by constant freeze-thaw cycles and why concrete fails in Central New York is the first step toward making smarter decisions about concrete repair, replacement, and what to ask your contractor. This guide breaks it down. Each of the five mechanisms below can damage concrete on its own. In Syracuse, all five often work together on the same slab at the same time.


1. Freeze-Thaw Cycling: The Relentless Pressure From Within

Concrete looks solid, but it’s full of tiny pores and capillaries, microscopic channels that absorb water just like a sponge. That’s normal and unavoidable. The problem starts when temperatures drop.

When water freezes, it expands by about 9%. Inside a concrete pore, that expansion has nowhere to go. It pushes outward against the pore walls with forces that can reach thousands of pounds per square inch. The pore widens slightly. When the ice thaws, the water drains away but the crack it created stays larger than before. The next freeze pushes deeper into that now-wider crack. The cycle repeats.

In Syracuse, this doesn’t happen just a few times a season. Temperature data shows the city averages roughly 100 freeze-thaw cycles per winter meaning temperatures cross the 32°F threshold in both directions approximately 100 times between November and April. That’s 100 rounds of internal expansion and contraction, each one slightly worsening damage the previous cycle started.

This is why a sidewalk can look perfectly fine in October and be obviously crumbling by April. This Syracuse concrete damage doesn’t accumulate gradually. It accelerates. Each cycle has more existing cracks to exploit than the one before it.

What this means for your walkway: Any crack that isn’t sealed before winter becomes a water entry point. Water that gets into a crack in October is actively widening it by February. Early crack sealing is the single highest-ROI maintenance task available to a Syracuse property owner.

Syracuse concrete damage and repair

2. Road Salt: A Chemical Attack on Your Concrete

Salt doesn’t just melt ice. It attacks the concrete beneath it through several overlapping mechanisms that most homeowners don’t know about.

First, salt is hygroscopic. it actively draws water into the concrete’s pore structure. Research shows that salt-saturated concrete absorbs up to 10% more water than untreated concrete. More water in the pores means more expansion pressure when that water freezes. Salt literally sets up your concrete for worse freeze-thaw damage than it would otherwise experience.

Second, salt chemically degrades the concrete paste. Calcium hydroxide, a normal byproduct of the cement curing process, reacts with calcium chloride from road salt to form calcium oxychloride. These crystals grow and expand inside the concrete matrix, creating internal pressure that fractures the paste from within. The result is the distinctive gray, flaky scaling you see on Syracuse sidewalks every spring: the top layer of cement paste peeling away to expose the aggregate beneath.

Third, chloride ions corrode steel. In any concrete that contains rebar or wire mesh reinforcement, including many Syracuse residential walkways, chloride ions migrate through the concrete and attack the steel. Steel rust expands, cracking the surrounding concrete from the inside. This is one reason why deteriorated walkways sometimes seem to fall apart suddenly: the interior damage was invisible until the concrete had nothing left to hold it together.

All of this is compounded by the fact that Syracuse roads and sidewalks receive heavy salt applications from November through March, sometimes multiple times per week during an active winter. The cumulative chemical exposure over 10 or 15 winters on a standard concrete walkway is substantial.

What this means for your walkway: Rock salt on or near your private walkways accelerates deterioration significantly. Sand provides traction without chemical damage. A penetrating concrete sealer applied every few years creates a barrier that slows chloride penetration. And when replacement is needed, specifying the right concrete mix matters enormously which brings us to the next point.

3. The Wrong Concrete Mix: Most Slabs Were Never Built for This Climate

Not all concrete is the same. A standard residential mix poured without regard for freeze-thaw exposure will fail noticeably faster in Syracuse than properly specified concrete, sometimes within three to five winters. Two specifications make the critical difference in Central New York:

Air entrainment

Air-entrained concrete has microscopic air bubbles deliberately introduced into the mix during batching. When water in the surrounding paste freezes and expands, these tiny bubbles act as relief valves; the expanding ice has somewhere to go without fracturing the paste walls.

The American Concrete Institute (ACI) recommends 5-7% air content for exterior concrete exposed to freezing and thawing. The ACI notes that the freeze-thaw resistance of properly air-entrained concrete is improved by several hundred percent compared to non-air-entrained concrete. This is not a minor upgrade. It is the difference between a walkway that lasts 25 years and one that needs replacing after eight.

Compressive strength (PSI)

Michigan Concrete Association guidelines, and industry practice for cold-climate states, call for a minimum of 4,000 PSI compressive strength for exterior flatwork exposed to cyclic freezing and thawing. Standard residential concrete is often batched at 3,000 PSI. In a place like Charlotte or Dallas, that’s fine. In Syracuse, it’s underpowered.

Higher PSI means a denser, less porous concrete matrix. Less porosity means less water absorption, which means less freeze-thaw damage and slower chloride penetration. The cost difference between a 3,000 PSI and 4,000 PSI mix is modest. The difference in service life in CNY conditions is substantial.

What this means for your walkway: When getting quotes for a new pour or replacement, ask specifically: “What PSI mix are you using, and is it air-entrained?” A Syracuse concrete contractor who can’t answer that question clearly or who dismisses it is a contractor to be cautious about. Ask us about our winter-rated concrete mixes specified for Central New York conditions.


4. Clay Soil and Frost Heave: The Ground Is Working Against You

The problem isn’t just what’s happening at the surface. The ground beneath your walkway is moving every winter and in much of Onondaga County, the soil type makes that movement worse than average.

Clay soils which are common in Camillus,  Baldwinsville, North Syracuse, and throughout Onondaga County are what engineers call frost-susceptible. When temperatures drop, clay doesn’t just freeze passively. It actively draws moisture upward from deeper in the ground through capillary action, a process called “cryosuction.” That moisture accumulates in layers just below the frost line and freezes into lens-shaped ice formations called ice lenses.

Ice lenses grow as long as water is available and temperatures stay below freezing. As they thicken, they push the soil and the concrete slab sitting on top of it upward. This is frost heave. A panel that was flush with its neighbors in October can be sitting an inch or more above them by February.

When temperatures warm, the ice lenses melt. But the soil doesn’t always return to its original position. Ground that was compacted over years can shift slightly with each heave-thaw cycle. Over several winters, panels that were once level develop permanent steps and tilts, the classic Syracuse sidewalk profile.

The solution isn’t just about the concrete on top. A properly prepared sub-base of typically 4–6 inches of compacted crushed stone breaks the capillary connection between the surface and the frost-susceptible clay beneath. It allows water to drain away rather than accumulate and freeze. Skipping this step is the most common cost-cutting shortcut in budget concrete work, and it’s what most often explains why a relatively new walkway is already heaving.

What this means for your walkway: If your replacement or new pour doesn’t include proper sub-base preparation, you’re likely to see the same heaving problem again within a few winters. Always ask your contractor: “How are you preparing the sub-base, and what depth of aggregate are you installing?”


5. Tree Roots: The Slow, Relentless Lift

Syracuse’s urban tree canopy is one of the city’s most valued assets. It’s also one of the leading causes of sidewalk and walkway damage in older neighborhoods like Strathmore, Eastwood, Sedgwick, and the Near Eastside.

Street trees planted decades ago now have root systems that extend far beyond the visible drip line. Roots follow the path of least resistance and a concrete slab with a small gap at the joint or edge is an easy target. As roots grow thicker year over year, they exert upward pressure against the underside of the concrete panel. Unlike frost heave, which cycles with the seasons, root pressure is continuous and cumulative. The lift gets worse every year, not just every winter.

Root-heaved panels create some of the most severe trip hazards found on CNY properties. A root that has been growing for five or ten years can lift a panel by two, three, or even four inches, well beyond the half-inch legal threshold, and well into the territory where a fall is likely to cause serious injury.

In Syracuse, concrete damage caused by tree roots also complicates repair options. A panel lifted purely by frost heave may be a candidate for mudjacking or foam leveling, lifting it back into position is often practical and cost-effective. A panel lifted by a living root system is different: the root will continue growing, and the panel will continue rising. In most root-damage cases, the right solution is removal of the offending root segment (with proper permits where city trees are involved) and a full replacement pour.

What this means for your walkway: If you have mature street trees near your walkway, inspect annually. Root lift that’s caught early at one-half inch is far cheaper to address than root lift that’s been ignored for three years.

How the Five Work Together: A Typical Syracuse Walkway Story

These five mechanisms rarely operate in isolation. Here’s how a typical CNY walkway deteriorates over a decade:

  1. A standard 3,000 PSI, non-air-entrained walkway is poured on a thin or improperly compacted base. It looks fine for the first couple of winters.
  2. Road salt from the adjacent street and from ice management on the property begins penetrating the porous mix. Subtle surface scaling starts in years 2–3.
  3. Clay soil beneath the slab begins heaving in winter 3 or 4. Panels shift slightly. A hairline crack opens at a joint.
  4. Water enters the crack every fall. Freeze-thaw cycling widens it each winter. By winter 5 or 6, the crack is visible and water is pooling.
  5. A nearby tree root finds the gap beneath the slab and begins growing into it. Root pressure adds to the frost-heave displacement. By year 8, one panel is sitting an inch above its neighbor.
  6. By year 10, what looked like a cosmetic issue is now a legal trip hazard, a liability exposure, and a repair bill that is significantly larger than it would have been at year 4.

This isn’t a worst-case scenario. It’s a description of thousands of properties across Onondaga County right now.


What You Can Do About It

Knowing the mechanisms gives you practical power over them:

  • Inspect every spring. Catch frost heave and crack development early, when options are less expensive.
  • Seal cracks before winter. Remove the water entry point before the first freeze and you stop the damage cycle before it starts.
  • Use sand, not rock salt. Sand provides traction without accelerating chemical and freeze-thaw deterioration.
  • Apply a penetrating sealer. A silane/siloxane sealer applied every 3–5 years dramatically slows chloride penetration and water absorption.
  • When replacing, specify correctly. Insist on 4,000 PSI air-entrained concrete and proper sub-base preparation. These aren’t upgrades. They are the baseline for CNY conditions.
  • Watch your trees. Annual inspection near tree roots catches problems at one-half inch rather than 2 inches.

Ready for an honest assessment? A-Z Construction & Restoration has been working in Syracuse and Onondaga County since 1986. We know these soils, these trees, and these winters. If you’d like a free walkway inspection and a straight answer about what you’re dealing with, we’re ready. Schedule your free estimate or call 315-488-5292. Monday through Saturday, 7 AM to 7 PM.


Related Guides in This Series


References

  1. Syracuse, NY Snowfall Totals & Snow Accumulation Averages. Current Results. Based on NOAA National Centers for Environmental Information Climate Normals, 1991–2020.
  2. How Salt Damages Concrete. CreteDefender.
  3. Cold Weather Concreting. Michigan Concrete Association. (4,000 PSI exterior flatwork specification.)
  4. Damage Mechanism and Modeling of Concrete in Freeze–Thaw Cycles: A ReviewBuildings, MDPI (peer-reviewed). August 2022.

This guide is for general informational purposes only. Concrete specifications and best practices referenced reflect industry standards as of 2026. Consult a licensed concrete and masonry contractor for project-specific guidance.

Sidewalk Liability & Constructive Notice in New York: What Property Owners Must Know

Is It Your Fault? Understanding Sidewalk Liability and Constructive Notice in New York

A-Z Construction & Restoration  ·  Syracuse & Onondaga County  ·  Updated March 2026

What the Financial Exposure Actually Looks Like

People often defer sidewalk repairs because they are focused on the cost of the fix. Here’s the sidewalk liability in New York comparison that should reframe that calculation.

ScenarioTypical Cost
Crack sealing / minor repair$300 – $800
Single panel replacement$700 – $1,500
Full walkway replacement$2,000 – $5,000
Minor slip-and-fall settlement (sprain, minor injury)$10,000 – $20,000
Moderate injury settlement (broken bone, surgery)$30,000 – $75,000
Serious injury settlement (back, neck, head injury)$100,000 – $400,000+

Settlement figures above are based on reported New York slip-and-fall case data from the NYC Comptroller’s Office and published attorney case results. Every case is different and amounts depend on injury severity, evidence, and many other factors.

The point is not to alarm you unnecessarily. It’s to reframe the question. A $1,500 slab repair isn’t an expense. It is insurance against a loss that can be 50 to 200 times larger.


The 1-3 Family Home Exception: Does It Apply to You?

There is one significant exception in New York’s sidewalk liability framework that many homeowners don’t know about.

If your property is a one-, two-, or three-family home that is owner-occupied and used exclusively for residential purposes, the law carves out a different liability arrangement for the public sidewalk along the street. In that case, liability for injuries on the adjacent public sidewalk may fall to the municipality rather than the owner, subject to strict notice and filing requirements.

However, this exception does not protect you in the following situations:

  • Any walkway on your private property (from your door to the street, around the house, etc.)
  • If you created the dangerous condition yourself
  • If you made special use of the sidewalk (installed a feature, modified it, etc.)
  • If any commercial activity occurs at the property, even part-time or incidental use can eliminate the exception

Multi-family rental properties (4+ units) and commercial properties receive no exemption. The full liability framework applies regardless of whether you live on-site.

If you’re uncertain whether your property qualifies for the residential exception, that’s a question for a New York attorney, not an assumption to make on your own.


What to Do After a Syracuse Winter: A Simple Liability Protection Checklist

The single best thing a property owner can do is inspect regularly and document what they find. Here’s a practical approach:

  • Inspect every spring. Walk your entire property perimeter after the last hard freeze. Look for heaving, cracking, rocking panels, and drainage problems.
  • Photograph and date-stamp everything. Even if you don’t see anything alarming, a photo record establishes that you were looking. If you do see a problem, photos establish when you first identified it and that you acted promptly.
  • Get repairs done quickly. Once you’re aware of a hazard, the clock on your constructive notice record starts. Prompt action is your best legal protection.
  • Keep receipts and records. A history of regular maintenance and repairs is strong evidence of a reasonable property owner. It doesn’t just protect you legally — it can also help with insurance claims.
  • Don’t assume the city will handle it. Even with Syracuse’s Municipal Sidewalk Program covering the public path along the street, your private walkways, steps, and stoops are your responsibility entirely.

The Bottom Line

New York’s sidewalk liability law is not subtle. If you own property, you have a legal duty to keep your walkways safe. If you know or should have known about a hazard and did nothing, you are exposed to potential sidewalk liability in New York. The ½-inch standard is specific and measurable. The consequences of ignoring it are real and substantial.

The good news is that prevention is almost always cheaper than the alternative. A free inspection by a qualified and licensed concrete masonry contractor, an honest assessment, and timely repairs are the most effective liability management tools available to any Onondaga County property owner.

Concerned about your property’s exposure? A-Z Construction & Restoration has been helping Syracuse and Onondaga County property owners assess and repair sidewalks, walkways, and steps since 1986. We offer free on-site inspections — no obligation, no pressure, just an honest look at what you’re dealing with. Schedule your free inspection or call us at 315-488-5292. Monday through Saturday, 7 AM to 7 PM.

Sidewalk Liability in New York: The Law Every Property Owner Needs to Know

You walk past your front walkway every day. It’s been cracked for a while. Maybe since last winter, maybe longer. You’ve noticed it, made a mental note, and figured you’d deal with it eventually. Then one afternoon a neighbor trips on it, goes down hard, and ends up in the ER with a broken wrist.

Are you liable? In New York, the answer is almost certainly yes, and the law regarding sidewalk liability in New York doesn’t care that you hadn’t gotten around to fixing it yet.

This guide explains how sidewalk liability works in New York, what the legal concept of constructive notice means for property owners, and why waiting is almost always the more expensive choice.

Note: This article provides general legal information for educational purposes. It is not legal advice. If you are facing a specific liability situation, consult a licensed New York attorney.

sidewalk liability in New York Syracuse and Onondaga County

The Law in Plain English: You Are Responsible

New York law, specifically NYC Administrative Code §7-210, which sets the standard applied across New York State courts, places a clear duty on property owners: you must maintain the sidewalk and walkway adjacent to your property in a reasonably safe condition.

That duty covers:

  • Repairing cracked, broken, or uneven concrete panels
  • Addressing trip hazards caused by frost heave or tree root uplift
  • Removing snow and ice within a reasonable time after a storm
  • Fixing improperly sloped surfaces that pool water and refreeze
  • Correcting any raised hardware, grates, or utility covers above the walking surface

And here’s what makes this law particularly significant: the duty is non-delegable. That means you cannot hand it off. If you hire a property manager, assign a tenant to handle maintenance, or contract a repair company and something still goes wrong, you remain the legally liable party. Courts have consistently ruled that property owners cannot escape responsibility by pointing to someone else.


What Is Constructive Notice and Why It’s a Problem for Most Homeowners

There are two ways you can be considered legally “on notice” of a hazardous condition.

Actual notice is straightforward: someone told you about the problem. A neighbor complained, a tenant submitted a maintenance request, the city issued a violation, or you personally observed the defect. From that moment, the clock is ticking.

Constructive notice is where most property owners get caught out. The law says that if a dangerous condition existed long enough that a reasonable property owner conducting regular inspections would have discovered it, you are considered to have known about it. You don’t actually have to have seen it. The defect’s existence over time creates the legal presumption that you should have.

In practice, this means:

  • A heaved panel that’s been lifting since last spring? You’re on constructive notice.
  • A crack that’s been widening for two winters? You’re on constructive notice.
  • Tree root damage that’s been visible for years? You’re on constructive notice.

Evidence that a condition persisted for months or years is typically sufficient to establish constructive notice in New York courts. Dated photographs, DOT violation records, 311 complaint logs, and maintenance records can all be used to demonstrate how long a hazard existed and courts take that evidence seriously.

“I didn’t know it was that bad” is not a defense. New York courts have explicitly held that a property owner’s subjective belief that a condition is not dangerous is insufficient to avoid liability. The standard is objective: what a reasonable person conducting reasonable inspections would have found.


The ½-Inch Rule: Where the Line Is Drawn

New York Administrative Code §19-152 gives property owners a specific, measurable standard to work from. A legal trip hazard exists when:

  • The vertical gap between two adjacent sidewalk panels is ½ inch or greater
  • A surface defect is 1 inch or more in horizontal area and ½ inch or more deep
  • A panel is loose, rocks, or seesaws underfoot
  • There is a visible void beneath a panel (it has been undermined)

Half an inch is roughly the thickness of a pencil. It’s not a dramatic crack. It’s the kind of thing that’s easy to walk past a hundred times without thinking twice but it’s the legal threshold at which a court will hold you strictly liable if someone is injured, provided you had actual or constructive notice of the condition.

The courts don’t require a perfect sidewalk. For sidewalk liability in New York, what they require is reasonable maintenance and a response to known hazards. The ½-inch rule gives you a clear signal: once a gap or elevation change reaches that point, it needs to be addressed promptly.


CNY-Specific Hazards: Ice Heaves and Tree Roots as Legal Traps

Two hazards are particularly common in Syracuse and Onondaga County and both are legally actionable.

Ice heave and frost damage

Central New York’s clay soils and aggressive freeze-thaw cycles cause sidewalk panels to lift and shift every winter. A panel that was flush in October may be sitting ½ inch or more above its neighbor by April. Property owners who walk past this damage daily and take no action are establishing exactly the kind of constructive notice record that plaintiffs’ attorneys look for. The seasonal and predictable nature of frost heave in Syracuse makes it very difficult to claim you had no reason to expect it.

Tree root uplift

Syracuse’s mature street trees push roots beneath walkway panels year after year, lifting them progressively. Unlike frost heave which can happen quickly, root damage develops slowly and visibly. That slow, visible progression is precisely what constructive notice is designed to capture. A root-heaved panel that has been rising for two or three seasons is one of the clearest examples of a condition you should have found and fixed.

It’s worth noting that the City of New York’s Parks Department operates a Trees & Sidewalks Program that can help qualifying residential property owners with root damage repair. In Syracuse, contact the Department of Public Works to understand your options. But the existence of a potential city program does not suspend your liability in the meantime. If someone is injured before a repair is made, the legal exposure is yours.

Related Guides in This Series


Sources

  1. NYC Administrative Code §7-210 — Liability of Real Property Owner for Failure to Maintain Sidewalk in a Reasonably Safe Condition. American Legal Publishing.
  2. NYC Administrative Code §19-152 — Duties and Obligations of Property Owner with Respect to Sidewalks and Lots. American Legal Publishing.
  3. Which Party Is Responsible for Maintaining Sidewalks in New York City? Leandros A. Vrionedes, P.C. August 2025.
  4. Trees & Sidewalks Program. NYC Parks Department.

This article is for general informational purposes only and does not constitute legal advice. Laws referenced reflect New York State and NYC Administrative Code standards applicable across New York as of March, 2026. Consult a licensed New York attorney for guidance specific to your property and situation.

The Complete Guide to Sidewalk & Walkway Repair in Syracuse, NY (2026)

The Complete Guide to Sidewalk & Walkway Repair in Syracuse, NY

Costs  ·  Laws  ·  When to Repair vs. Replace  ·  2026 City Program Explained

Sidewalk Repair in Syracuse NY – Responsibility & Liability

If you own a home or business in Syracuse, your sidewalks and walkways take a beating every single year. The freeze-thaw cycles, the road salt, the old street trees. It all adds up. And sooner or later, you’re standing in your driveway in April looking at a cracked, heaved slab wondering: Do I have to fix this? How much will it cost? Is this my problem or the city’s?

This guide answers all of it. No jargon, no filler, just what Onondaga County property owners need to know.


Why Syracuse Is So Hard on Concrete

It comes down to one thing: water. Concrete is porous. It absorbs moisture. In a place like Phoenix or Charlotte, that’s not a big deal. In Syracuse, it’s a slow-motion disaster.

Every time the temperature crosses 32°F, which happens roughly 100 times over a typical Central New York winter, any water that’s soaked into your concrete freezes and expands by about 9%. That expansion pushes outward with thousands of pounds of pressure per square inch, widening any crack or weak spot it finds. When it thaws, the crack stays wider than it was before. Next freeze, it goes a little further. Repeat 100 times a winter, year after year.

Add road salt into the mix and the damage accelerates. Salt chemically degrades the surface layer of concrete, causing the gray, flaky scaling you see on Syracuse sidewalks every spring. And if you’ve got clay soil under your slabs, which is common in Mattydale and across much of Onondaga County, the ground itself can heave up and push panels out of position.

The result: walkways that looked fine in October can be a genuine trip hazard by April and in need of serious concrete sidewalk repair.

🌳 Don’t overlook your street trees. Syracuse’s mature urban tree canopy is beautiful. But it is one of the leading causes of sidewalk damage in older neighborhoods. As roots grow beneath your walkway, they push individual panels upward, sometimes by several inches. Unlike frost heave, root damage gets worse every year. A one-half inch lift this spring becomes a 2-inch trip hazard in three years. 


The 2026 Syracuse Sidewalk Program and What It Covers

Good news first: In 2021, the Syracuse Common Council voted to take over maintenance of public sidewalks, the paved paths along city streets, between the curb and your property line. The city now manages and repairs those, funded by an annual fee.

Property Type: 

  • Residential (1-2 family) – Annual Fee 2026:  $100/year
  • Commercial – Annual Fee 2026: $300/year

⚠️ Here’s the part most homeowners miss. The Municipal Sidewalk Program only covers the public sidewalk along the street. It does not cover the walkway from your door to the street, your driveway or apron, steps and stoops, or any walkway on private property. You are still fully responsible, both legally and financially, for all of those surfaces. You’re also still on the hook for snow and ice removal from the public sidewalk in front of your property.

Your Legal Responsibility as a Property Owner in New York

New York law is clear and it doesn’t leave much wiggle room. Property owners have a legal duty to keep their walkways in reasonably safe condition. If someone trips and falls because of a defect you failed to fix even if you didn’t know about it, you can be held liable. That last part matters. The legal standard is called constructive notice: if a problem existed long enough that a reasonable inspection would have found it, you’re considered to have known about it. “I didn’t know my sidewalk was cracked” is not a defense after a Syracuse winter.

The Half-Inch Rule

New York Administrative Code §19-152 defines a legal trip hazard as any vertical gap between two adjacent sidewalk panels of one-half inch or greater, roughly the thickness of a pencil. Panels that rock, slabs with surface holes deeper than one-half inch, and any concrete that’s been undermined all qualify. If your walkway has a condition like this and someone gets hurt, the financial exposure is real:
  • A walkway repair today: $500 – $3,500
  • Average slip-and-fall settlement in New York: $15,000 – $50,000+
The repair is the cheaper option. By a lot. For a full breakdown of how liability works and what constructive notice means in practice, see our companion guide: Is It Your Fault? Sidewalk Liability in New York.

Repair or Replace? How to Know Which You Need

Not every cracked sidewalk needs to be torn out and repoured. The right answer depends on what’s actually wrong underneath.

Option 1: Crack Sealing & Patching

Good for minor surface cracking with no movement or sinking. Epoxy or polymer filler stops water from getting in. This buys time but it is not a fix for a slab that’s heaving or structurally compromised.

Option 3: Full Replacement

When the slab is cracked through, crumbling, lifted by roots, or too deteriorated to save. Old concrete is removed, the sub-base is properly prepared, and new concrete is poured with air-entrainment and a compacted gravel base built for CNY winters. Quick decision guide:
  • Crack seal: Surface cracks only, no movement, no sinking
  • Level / lift: Slab has sunk or tilted but the concrete itself is solid
  • Full replacement: Crumbling, root damage, repeated failures, or 25+ years old

What Does It Actually Cost in Syracuse? (2026 Pricing)

Prices in Central New York run below the NYC market but reflect local labor rates and material delivery. All figures below are for professional, licensed, and insured contractor work.

Type of WorkTypical Cost Range
Crack sealing & surface patching$3 – $8 per sq ft
Mudjacking / concrete leveling$3 – $8 per sq ft
Polyjacking (foam injection)$5 – $25 per sq ft
Partial slab replacement$7 – $15 per sq ft
Full walkway replacement$7 – $17 per sq ft
Tree root damage: full replacement$12 – $20 per sq ft

For most residential projects in Onondaga County, a single bad panel or small section runs $500–$1,500 repaired, and a full front walkway replacement typically falls in the $2,000–$5,000 range depending on size and complexity.

One practical tip: if you have multiple problem areas — a walkway, some steps, a cracked apron, schedule them together. Bundling jobs onto one contractor visit almost always lowers your per-item cost.

For a full cost breakdown including the real price of doing nothing, see our guide: Concrete Sidewalk in Syracuse and Central New York.


Your 5-Minute Spring Walkway Check

Every April, after the last hard freeze, take 5 minutes and walk your property. Catching problems early is the difference between a $600 patch job and a $4,000 replacement.

  • Look for lifted panels. Sight along the surface from a low angle. Any step or tilt between adjacent slabs is worth noting.
  • Check for rocking. Step firmly on the edge of each panel. If it rocks or sounds hollow, the base beneath it has failed.
  • Look near tree roots. Even a small lift this year means a bigger problem next year.
  • Measure any gaps. A ½-inch elevation change between panels is a legal trip hazard. Use a tape measure if you’re unsure.
  • Document with photos. Date-stamped photos establish a record of when you inspected and what you found — important if a liability question ever comes up.
  • Check drainage. Does water pool on or near the walkway? Standing water accelerates every problem on this list.

Not sure where your walkway stands? A-Z Construction & Restoration offers free walkway safety inspections across Onondaga County — no obligation, just honest answers from a crew that’s been doing this since 1986. GET A FREE ESTIMATE or call us at 315-488-5292. We’re available Monday through Saturday, 7 AM to 7 PM.


More Guides in This Series


Sources

  1. NYC Administrative Code §7-210 — Liability of Real Property Owner for Failure to Maintain Sidewalk in a Reasonably Safe Condition. American Legal Publishing.
  2. NYC Administrative Code §19-152 — Duties and Obligations of Property Owner with Respect to Sidewalks and Lots. American Legal Publishing.
  3. Syracuse Common Council Approves New Sidewalk Repair Program. NCC News, S.I. Newhouse School of Public Communications, Syracuse University. June 2021.
  4. Syracuse Officials Working on Sidewalk Program Funding. Spectrum News 1 Central NY. March 2025.
  5. Liability for Sidewalk Defects Causing Trips & Falls in New York. Zalman Schnurman & Miner P.C.

This guide is for general informational purposes only and does not constitute legal or engineering advice. Pricing reflects Central New York market conditions as of early 2026. For project-specific guidance, consult a licensed Syracuse masonry contractor and attorney.

â–˛